Finally found time to come back to the 3D printing. My previous posts area at
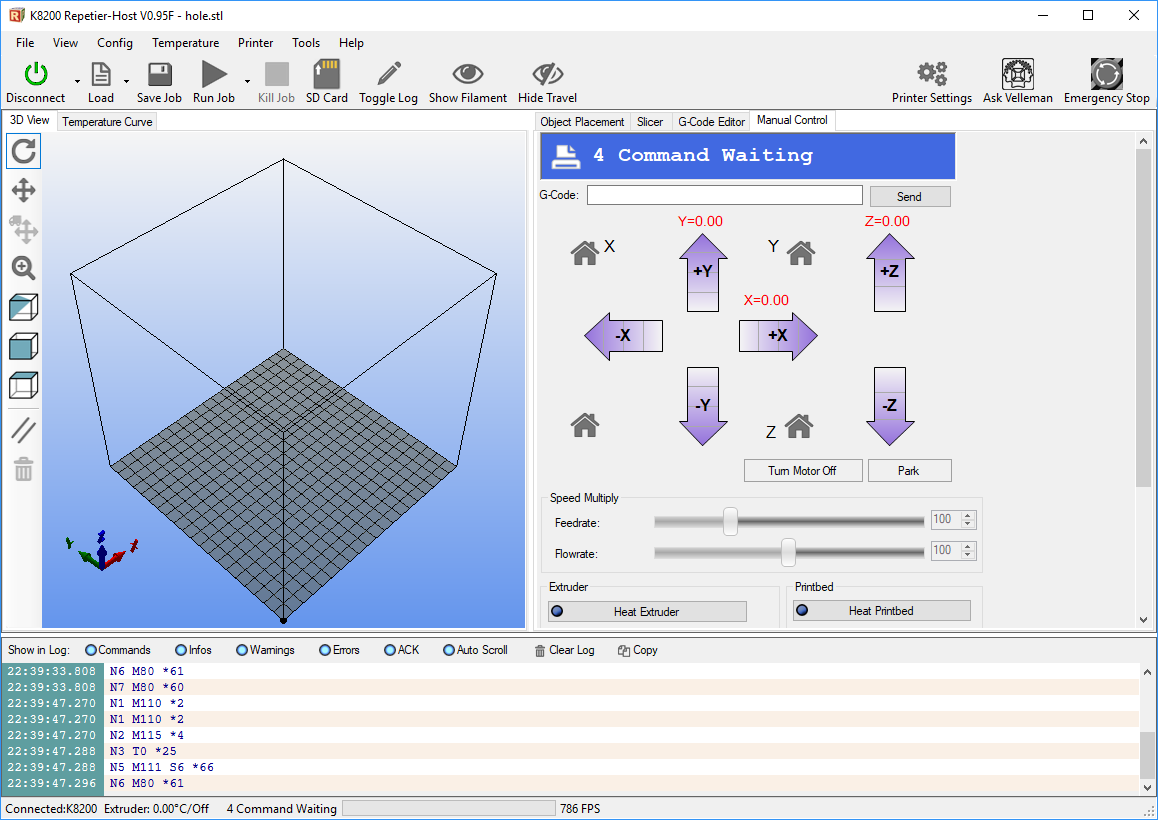
Status so far: installed a new Z-Axis update K8204. My next steps: solving teething troubles. Every now and then I manage to have the printer print something, but almost always I get into X Commands Waiting issue:
The saga k8200 for me continues. It is almost a year I assembled the printer. I am not able to print beyond one or two printouts. The symptoms are as before: I connect the printer, sometimes it obeys my manual commands, sometimes it does it with 20-30 delay, sometimes it is responsive only when it is not heating either extruder or the bed.
Is the power supply faulty? I’ve checked the open circuit voltage, and it plays within 2V range (from 13.5 to 15.1V or something):
What do you get when it’s attached to the machine with the bed and print head on?
That doesn’t look right.
A lot of the USB connectors were pulled off. No one wants to admit they messed up.
well, I had a successful print out recently, when I (1) attached the USB to the computer first and then (2) attached the power supply. Can you elaborate more on your question? Do you mean, what do I get of Voltage, when I attach it to the board? (we’ll I’ll try, but without attaching, it varying like hell, so with attaching it will vary even more I suppose)
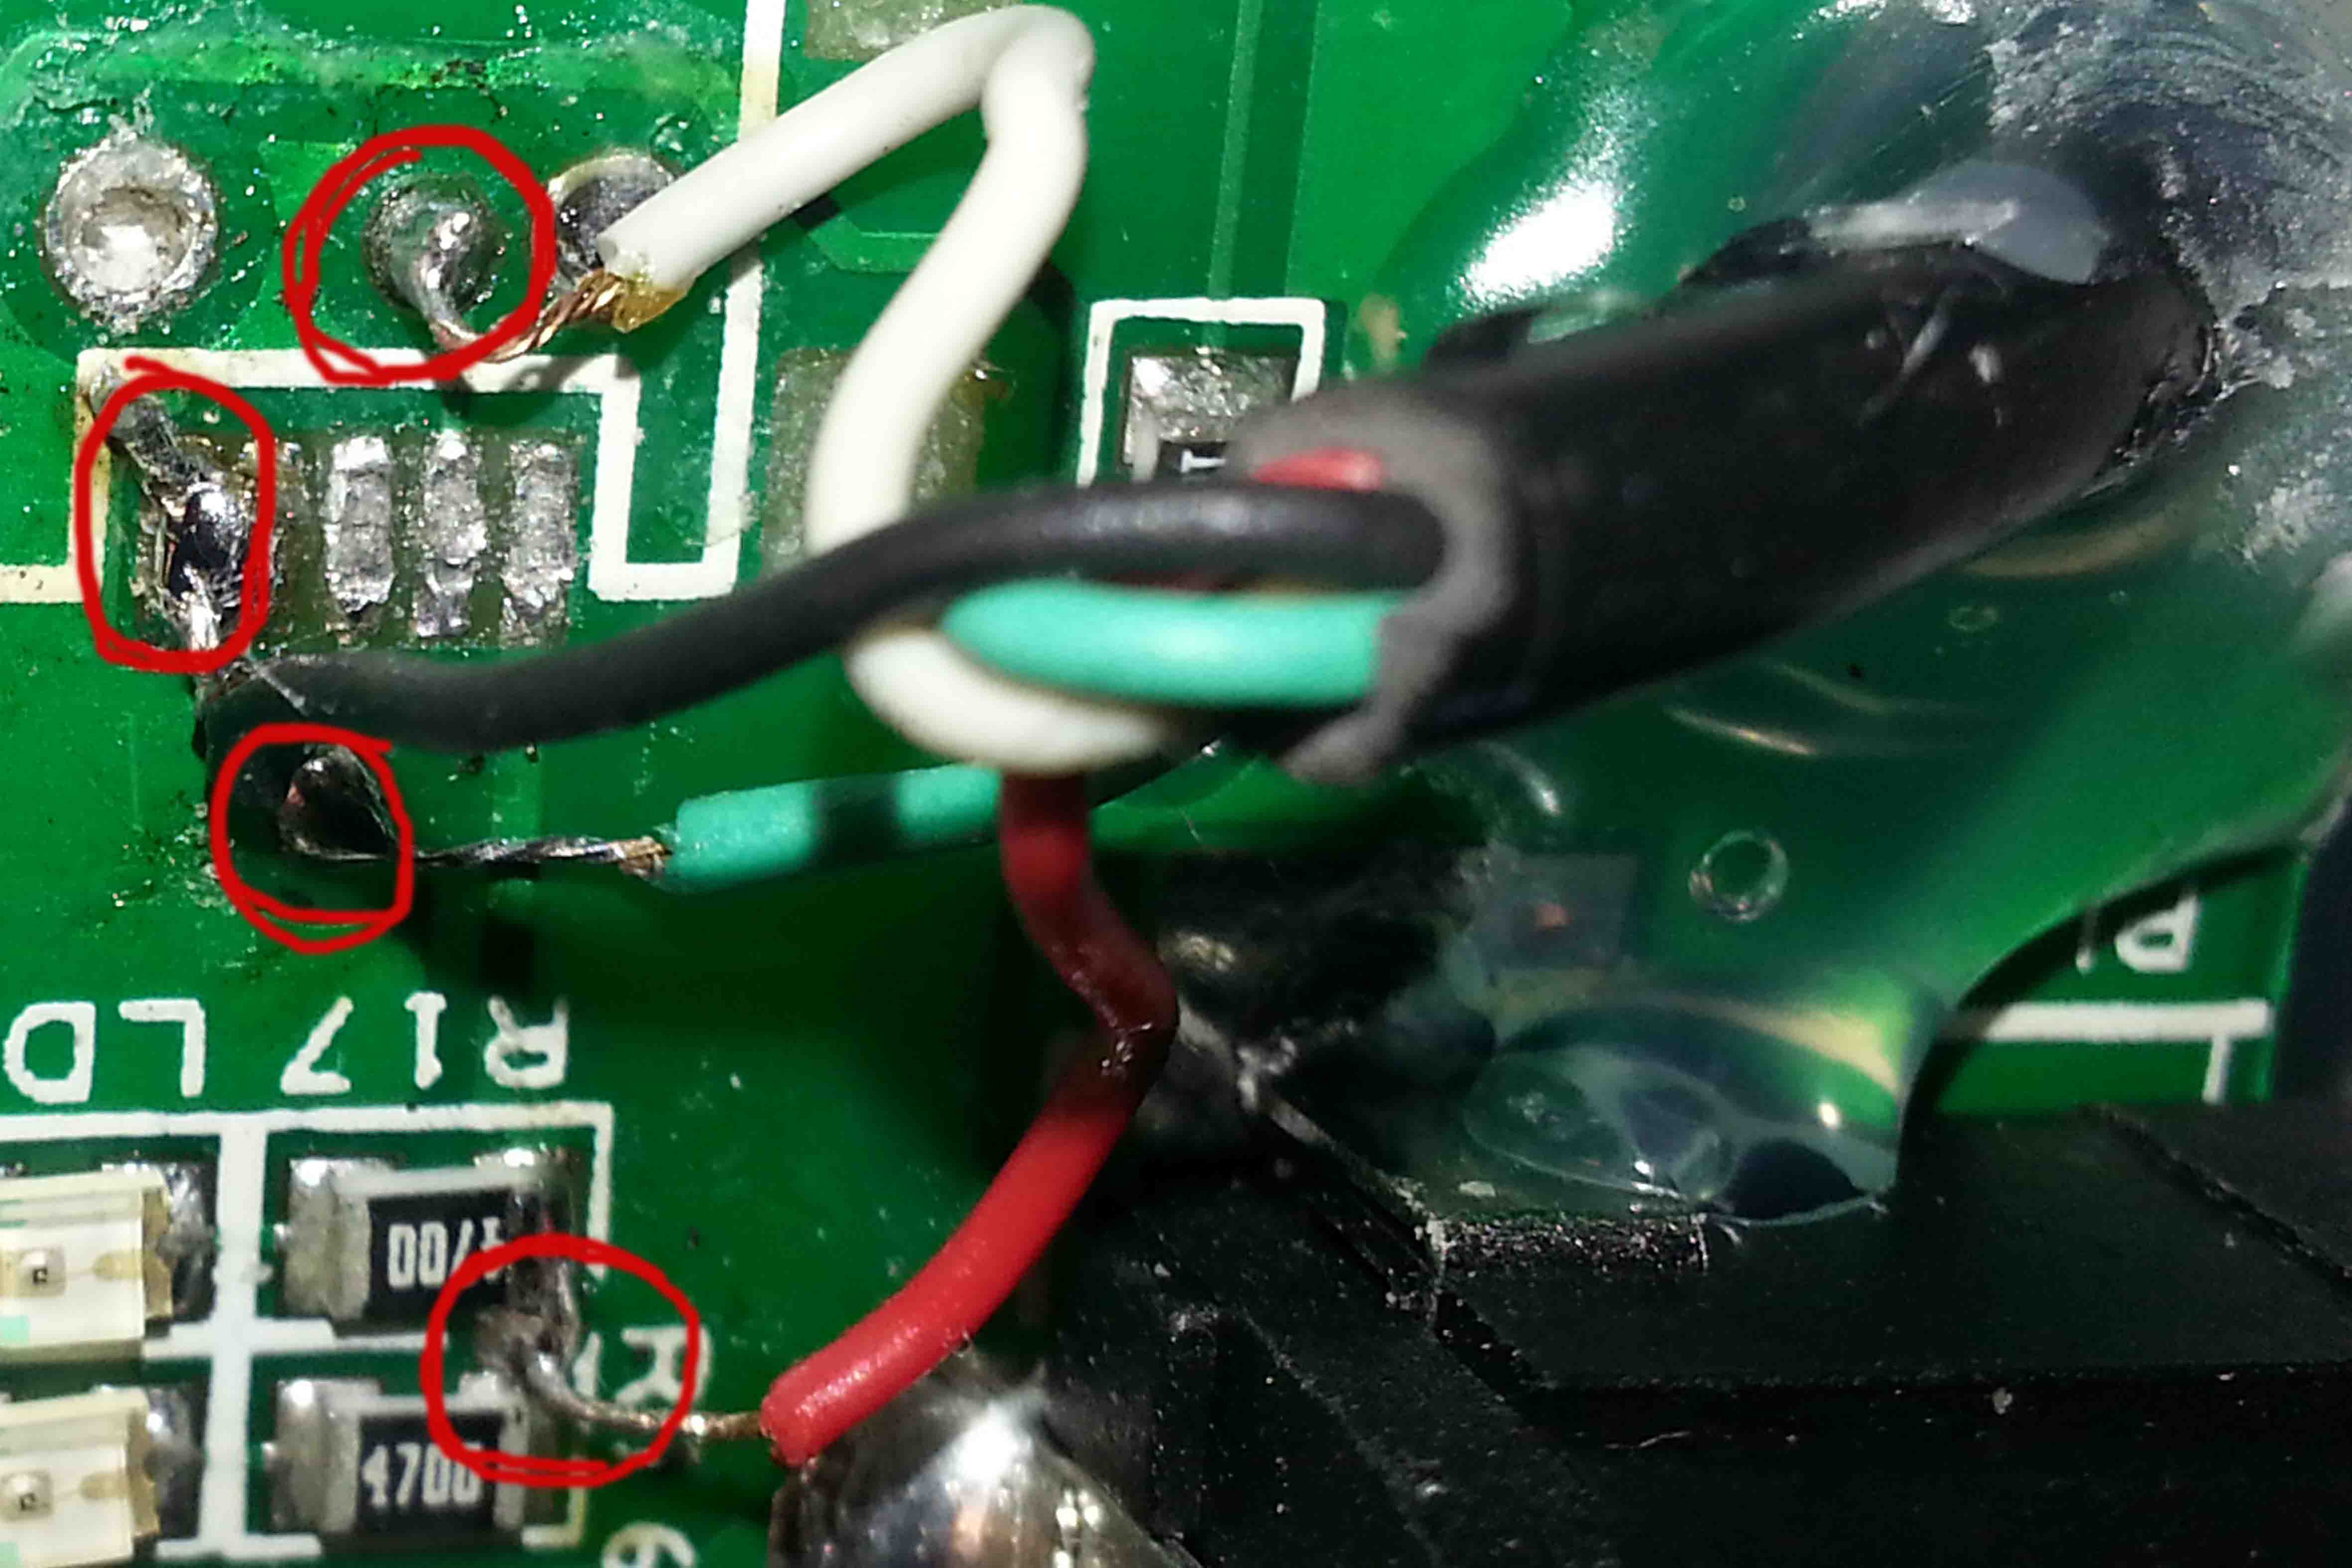
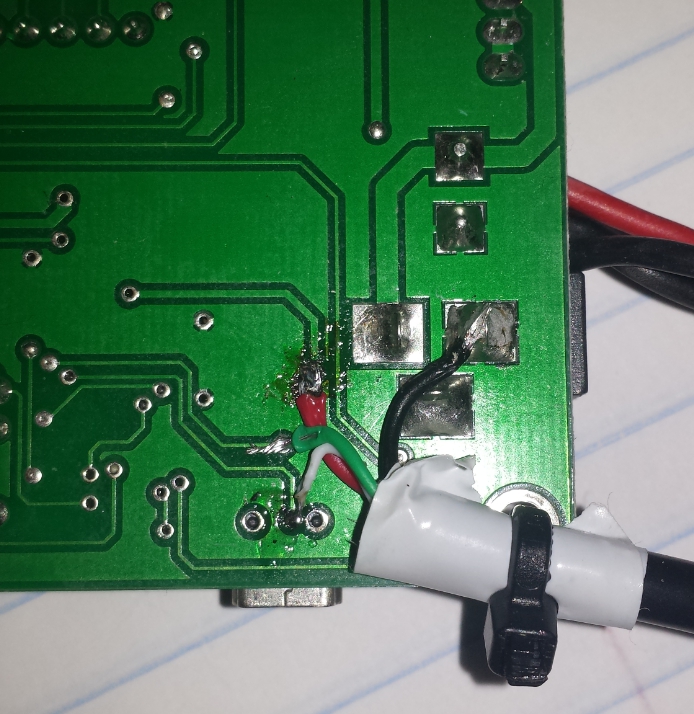
the usb connector is off.I’ll need to solder it now somehow…
If I attach the power supply to the board, the voltage stabilizes to 15.6V. It also blinks three times and goes off:
Early on I almost ripped my port off.
Someone uploaded these pictures and I downloaded them.
\I was luck and able to solder mine back on.
I don’t know how accurate they are but they said they worked.
@Wrong_Way: this is a very informative picture and gives me quite some food for thought. What’s really cool are the colors of the cables as well as the art how the cable was fixed on the board, so it doesn’t break again. I really hope that this was the reason why the board was not responsive.
On mine I got lucky and was able to solder it back on.
Like I said I did not do this but thought I would have to.
I saved the pictures in case I made another bone head move.
LOL.
I hope this helps you.
yes, thank this is helpful. May I ask how you soldered it back? put the thingy on top of it and pressed with a soldering iron on top of it? (I am trying to do this procedure right now)
First I tinned the pads then I aligned the tabs and super glued them making sure the pins were straight.
Then soldered the pins It was kind of hard since I kept getting shorts.
It took awhile but finely got it done.
I kept metering it in every way possible to make sure there were no shorts.
Since then I mounted a Raspberry pi on it with Octoprint and cable tied the cable to the frame so nothing would snag on it and pull the cable. It’s kind of nice the printer has Wifi I also mounted a web cam on it so I can watch and control it from my phone tablet of computer. Octoprint does have Cura so you can send the STL out to it but I like to slice it on my conputer. The Interface is web based very ease to use
so you superglued it… I though of super-gluing it myself. Then I though, I’d just heat it from above… but I do not think it was as successful as I though. I think I’ll just try to get those cables the way you have in your picture. If that does not work, I’ll just take them out… I thought it would be just enough to touch the points (without soldering). I placed the thingy, and checking with the multimeter, whether there’s a connection between the connection points in the picture and the cable.
That photo of yours was helpful. I soldered it they way you showed to me and was able to connect to the board from windows. This solved the broken usb thingy. Unfortunately, this brought me to the ground zero: I can connect to the board, but the repetier says : X commands waiting.
I have uploaded the video what the board shows when I connect power supply and usb to youtube:
Additional infos how I get from this “Waiting for Command X” unfortunate state every now and then: (1) I connect the 3d Printer to windows through usb, (2) I connect the 15V power supply, repetier gets into “6 commands waiting” state. (3) I unplug the power and plug the power (leave the usb connected). the thing continues to be responsive for a while. Comments?
Arturas
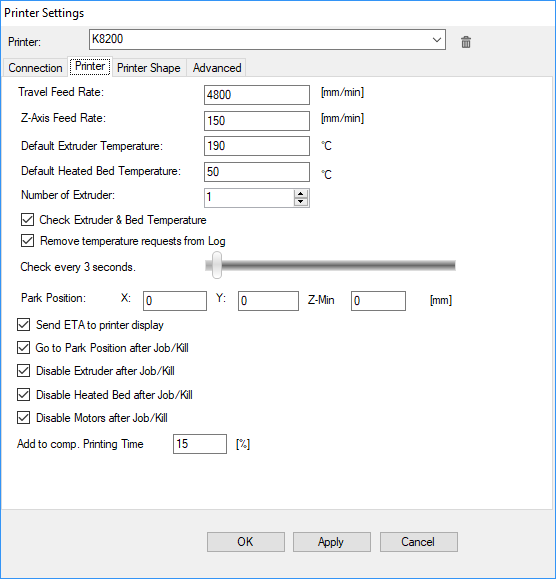
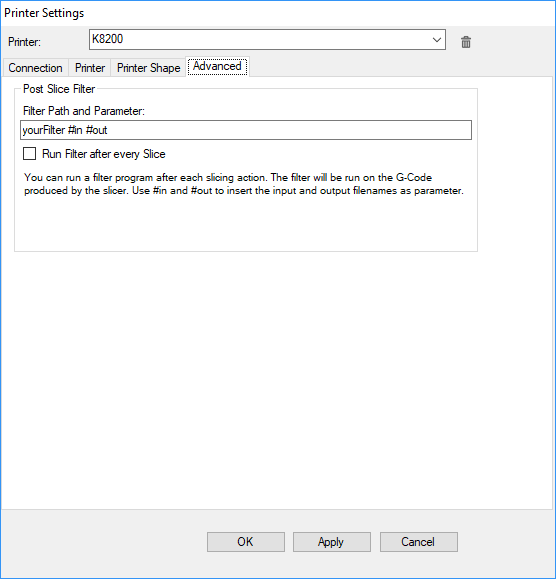
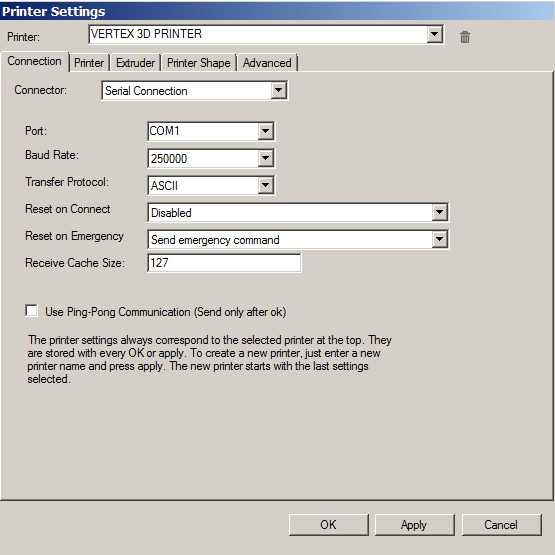
Go into the printer settings with the exception of the com port ever this should match this picture. I am thinking “Reset on Connect” is not set to disabled
You cannot imagine how many times I checked that bloody window! The manual says the “receive cache” needs to be a smaller value (I believe 63), but you pointed out in a previous post that I need to set it to 127. So I did.
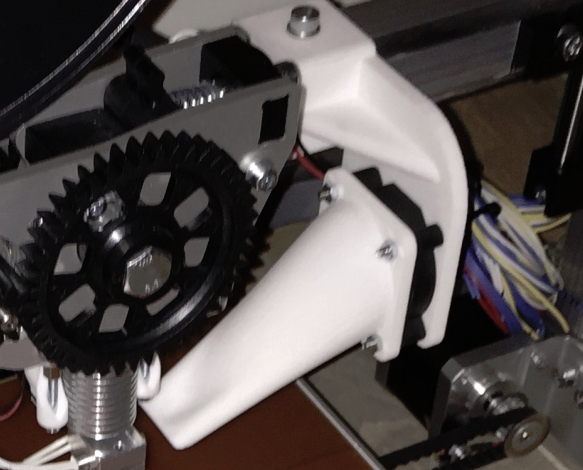
Wait. In my window it says “disable and reconnect”. In yours only “disable”. Let me check the laptop I am printing from. I’ll repost the screenshot once the printing is done (I am printing the v5-14clip.stl, a part for the fan part). In this post:
the fan parts look fancier. You’ve got the code maybe?
I noticed in your video that you connected the software then disconnected the power then reconnected it that might be a problem.
Also do not try to print the way you have the power connected. That jack can not handle the current draw and will melt.
If you have printed like that the jack maybe one of the problems.
So that jack might not handle the current draw, huh? This does not sound good. Because I also wanted to test the abs printing, and that would draw even more current (the bed needs to be heated to over 100 degrees C).
I started using the jacket, because it is bloody hard to unscrew those tiny screws and screw them up again, every time I get that bloody “wait for command X” problem. But once you mentioned, I could have plugged and unplug the power supply from my 220V net. I understand that this is not the same as re-plugging the thing on the 12V side (compared to 220V side), as there huge initial oscillations to at the time the power supply gets its initial voltage/current. But it is worth trying. I’ll try this as soon as the print finishes (another 40min to go).
it is extremely embarrassing, but I must say that the printer settings on my laptop (on which I am printing the print outs) had the wrong settings. Once I put into the correct ones, I am not able to reproduce that “waiting command X” error anymore (which is good news).
To my defense I must say that the options were correct on my desktop machine. In this case the usb connection problems (too long cable, motherboard, anything) could have resulted into the problem.
Bloody hell. I suppose this thread could be put aside for a while. Let me start a couple of other ones, especially, on the cuda part