When I got stumbled to the 1st problem that PLA does not flow smoothly:
I’ve played with the temperaturs from extruder (190-210C) and beds (50-60C) without too much luck. I also played a bit with the screw that fasts the PLA, not too much luck… And it looks to me that there’s not enough “push” for the PLA to go out…
When the extruder is heated, are you able to push filament through by hand? You should feel some resistance, but you should be able to get a clean bead of plastic if you rotate the large extruder gear by hand, or push the filament down into the hot end.
Does the extruder work if you raise the print head off the table? If your Z calibration is off, the nozzle can end up too close to the bed and the plastic cannot flow out smoothly. (I usually adjust the first layer height by turning the Z axis by hand while the skirt is printing.)
The extruder mechanism can get bound up if it is not assembled carefully. As I recall, I had to loosen the major bolts through the assembly and square it up carefully before re-tightening. As Wrong_Way points out, you want it to be bolted firmly, but not too tight.
It would be cool to get a better understanding about the k8200, extruder, dynamics, anything and everything.
To answer immediate questions: (1) The extruder does not let the PLA flow independent, if I raise the head off the table (1cm or more). (2) if I push the PLA somewhat forcefully, then it goes through, but of course, after some time everything stops. I’ll be experimenting with all the bolts then.
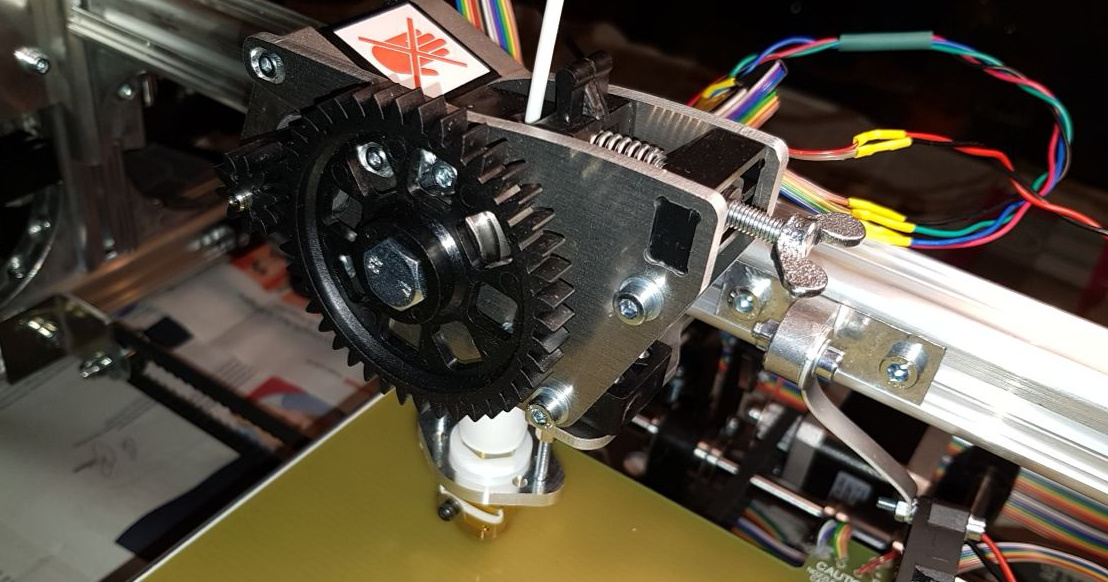
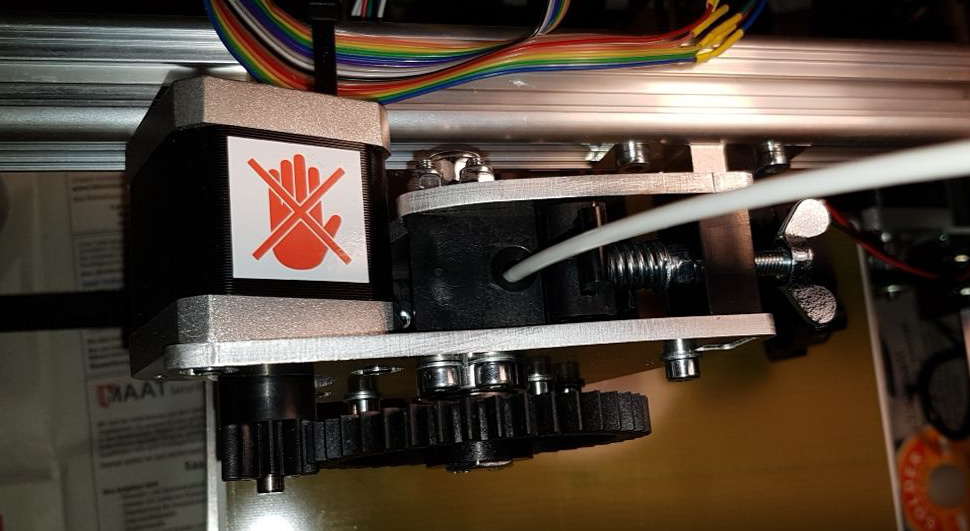
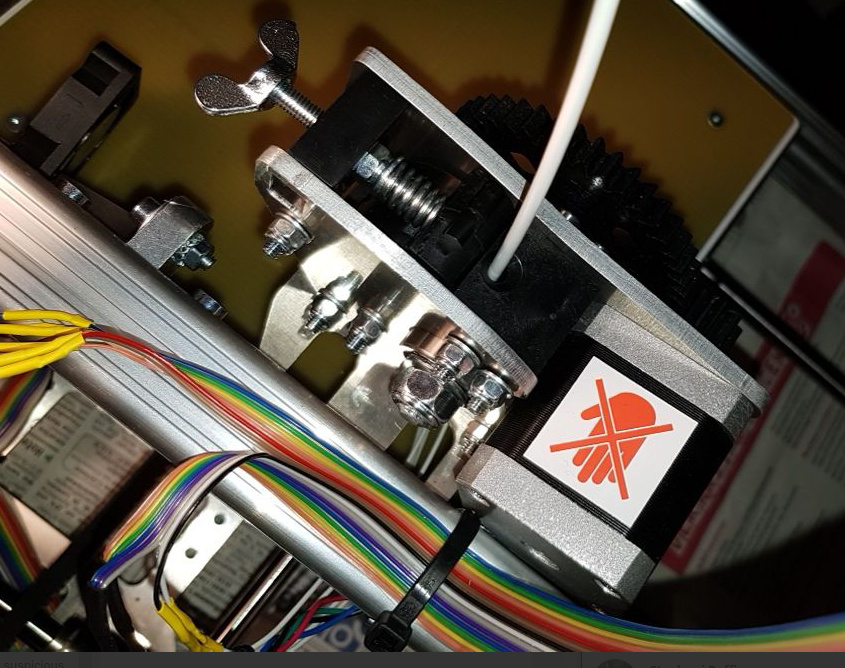
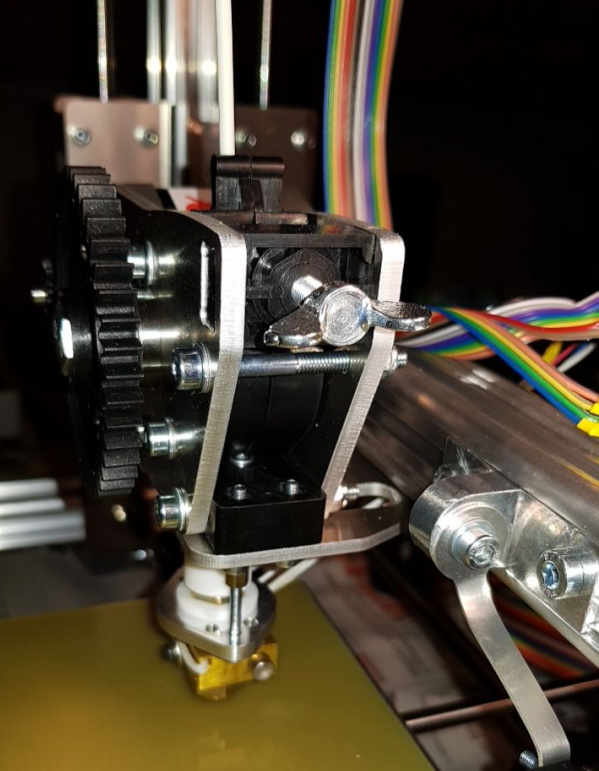
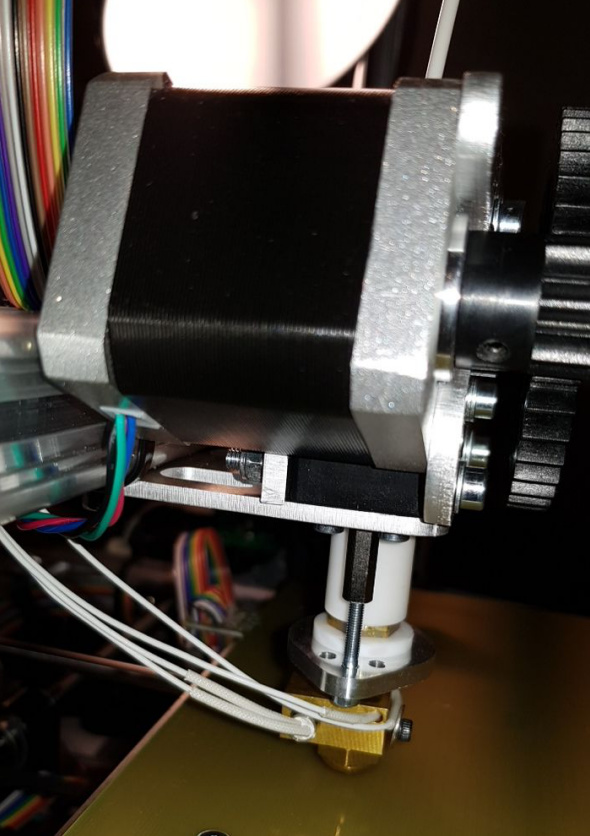
As I assembled the extruder, I really carefully placed the motor into the place, so the rotation is smooth but also the freedom/leeway between the cogs is as minimal as possible. After the complete assembly, interesting phenomenon was observed: for a complete rotaion or so, it was very easy to rotate the large cog, then it was a little bit harder.
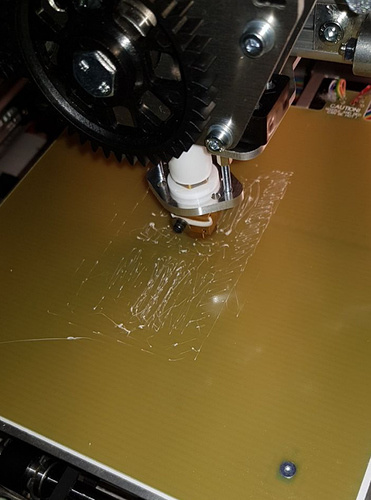
Can you also have a look at the pictures if everything looks suspicious to you?
Which bolts should I play with (make tighter/looser)?
Try backing the motor away just a little so the gears are not to close to each other.
Just to see if anything improves.
Also just wondering are you sure you are using PLA (should smell kind of sweet)
1.) Make sure the set screw in the small black gear is holding the gear to the motor shaft without any slippage.
2.) Make sure the two aluminum plates are parallel and aligned with each other. I found it worked to slightly loosen the nuts on all of the thru-bolts, then carefully move the plates around to make sure the plates align, and all plastic parts between the plates are correctly positioned and flush. Then tighten it back up, firmly but not over-tight. Try to torque them all down with the same amount of force. (It is difficult to see when things aren’t right, but not so difficult to feel it.)
3.) Inspect the knurled bolt where it grips the filament to ensure that it isn’t clogged with bits of plastic. (This is the bolt that passes through the center of the large black gear.) Make sure the nut on the knurled bolt is not too tight!
Thanks for the updates. I’ll revisit those one more time tomorrow (as things are getting towards the night in Europe).
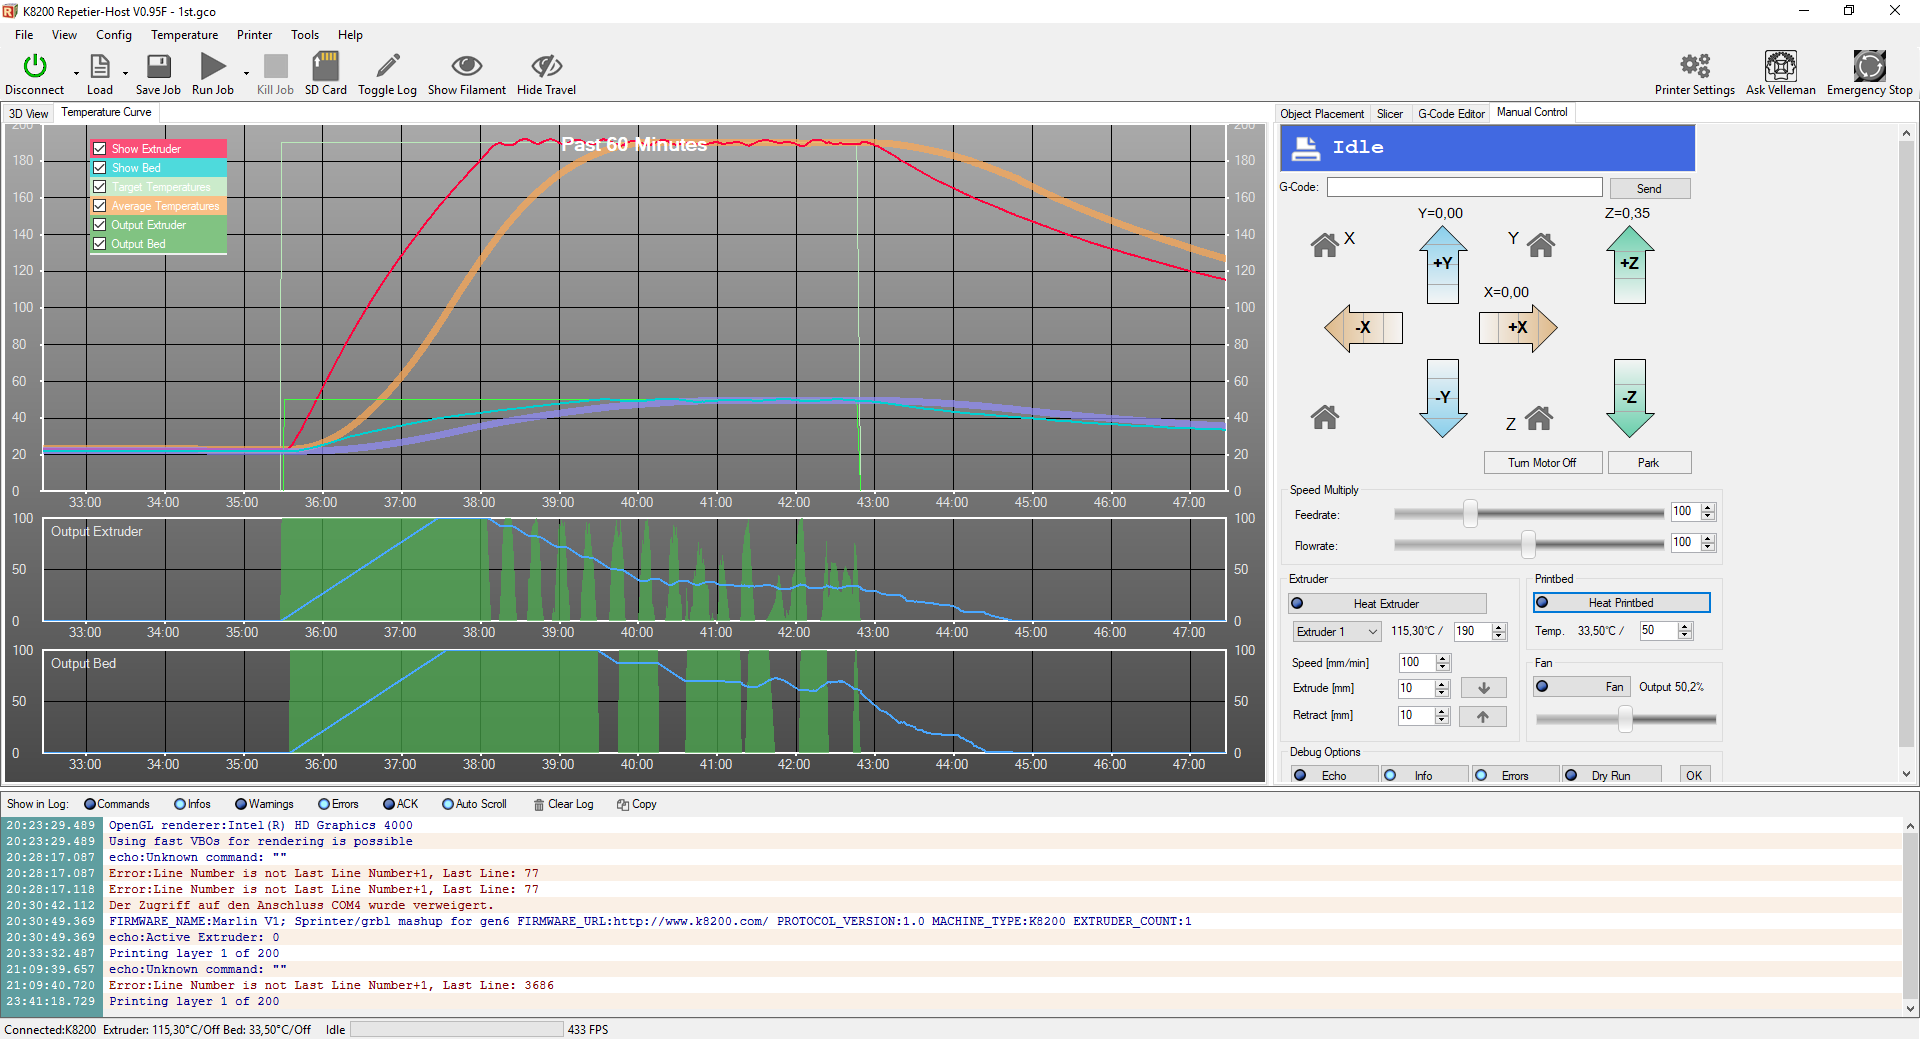
Update from my side: I’ve took the extrude apart, and realized that the PLA inside have bent, therefore, the big cog was not able to push the PLA downwards. I’ve took the bent part out, reinserted the PLA thingy, and enjoyed the movement as the cog moved. I’ve restarted the job, and the PLA was moving for a while. Afterwards it stopped again.
capital idea. Takes me forever to learn how to do it. Cause I do it with my phone, then upload to my computer , then reduce the size, then upload to youtube. Took me forever, hopefully, I’ll get faster with every next day:
forgot to push the “publish” button. Videos are on their way
Well, I have uploaded the videos. I’ve checked some of those, the quality is not perfect. I’ll reupload the full HD version of them tomorrow. Will be faster/beter from work. Upload connection from home is horrible (in Germany)
From what I could see the motor is not turning at all.
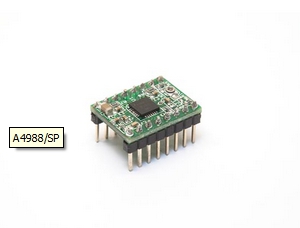
The easiest thing to check would be swap the extruder driver from the X or Y to the extruder.
this is to see if the problem moves. next check the wiring to the extruder motor.
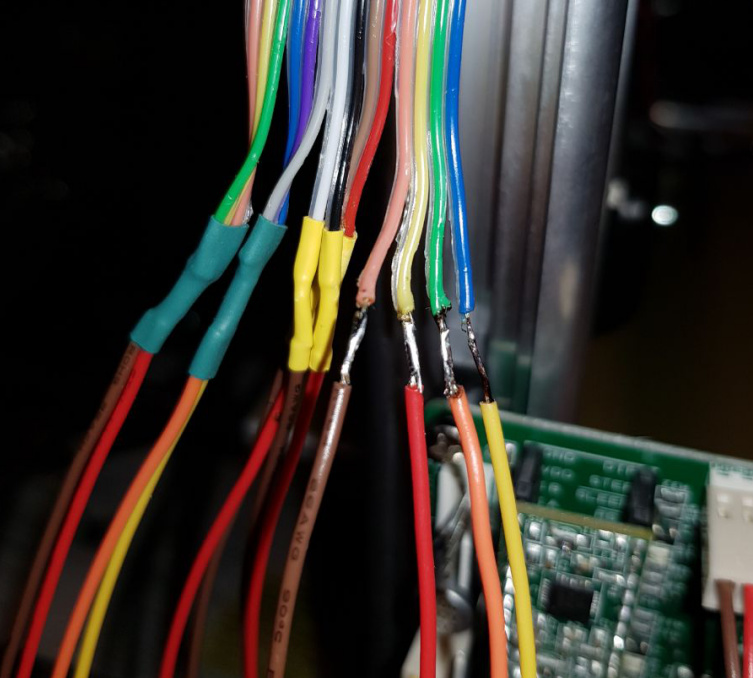
Make sure it is correct and there are no bad solder joints. since it started to move but then stopped and the bed running into the wires it kind of looks like a failing solder joint on the motor side but you should check them all.
Thanks for the tip. I really like the idea of swaping the extruder connection with the Motor X one. I suppose, if I press the HOME X button, that would be a way to test it, wouldn’t it? Is there a way to issue extruder motor command (something like: rotate clockwise for 5sec)?
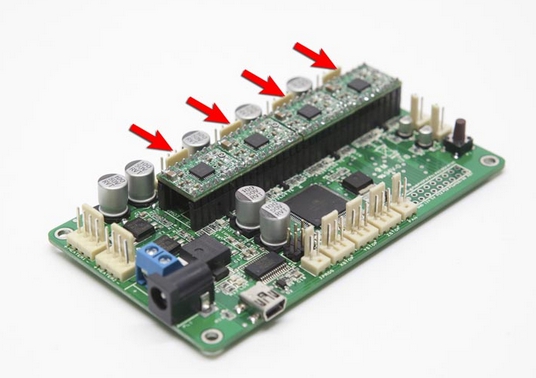
No not the connection.
Swap the driver board.
The one that you set the reference voltage on.
All 4 of those boards can be unplugged.
When you put it back in the board make sure the orientation is correct.
I did 0.5. I’ll increase it to 0.55 then. I’ll also resold the extruder cables just to be sure.
Even if I have a bunch of screws, it is bloody hard to get to the value around 0.55. What’s the tollerance there? Is it ok, if one motor has 0.555, and the other 0.547?
The wires are ok.
When you swapped the connectors and made the extruder run that was the proof.
You need to remove the driver card from the control board and swap it to the X or Y axis.
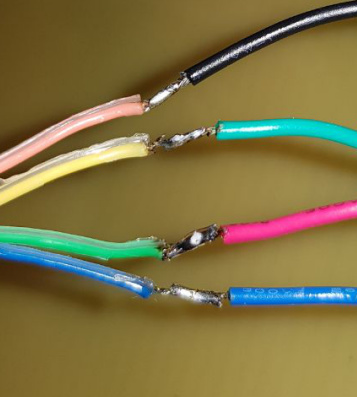
This is a picture of it off of the board.