I bought my very first 3D printer but can’t get it to work.
I did everything the manual said, but the print wont come out right.
I made a video from the moment I started the print untill it runs to sh*t.
I assembled the machine, put oil on the stands and cleaned the surfaces. I used isopropanol to clean the surface of the bed. Then I calibrated the height, did auto calibration and saved the settings.
What happens in the video.
Heats up to 130 degrees C
Does some check
Parks in the back of the machine and one of the magnets snaps loose
I re-attach the magnet by hand (tried it before without doing this but it messed up my plate)
The printhead starts but you immediatly see that the filament doesnt stick to the surface and it gets all messy.
At the end the entire project is loose from the bed and I stop the printer.
Thank you for your quick response.
I did those steps, but the first one (with the red light) doesn’t seem to change if I turn the knob.
There is little to no difference if I turn the knob all the way to the left or to the right. The red light always blinks if I tap it a bit.
See the following video of me tapping the plate and turning the knob.
I repeated the steps you told me and kept a close eye on the red LED.
Everytime the nozzle touches the base during the calibration the LED blinks so it ‘knows’ how far to go.
After the procedure I tried printing again.
The rod came loose just like before, and the printing didn’t even touch the base this time, it started pushing out filament to high this time so the entire string just waves around the machine.
Any help or pointers would be appreciated. #edit
After the procedure I also used a cloth with isopropanol on it to wipe the base clean (Man does that stink in the morning)
After the
English is not my native language so please pardon the grammar.
Did you trim the BuildTak with a razor blade to ensure that it doesn’t hang over the edge of the glass plate? The plate should be slightly loose in the clips.
Did you fully tighten the magnetic couplers onto the ends of the connecting rods? Did you clean and lubricate the magnetic balls? Do you see any black sludgy buildup on the magnetic balls?
How high is your Z-axis calibration? I believe there may be an issue in the Marlin firmware if your limit switches are so high that you get more than 300mm of Z-axis movement. (You can simply move the sensors lower down the tower and repeat the calibration process.)
Are you getting any black residue building up on the vertical rods? Be sure to clean and lubricate the rods, especially during the bearing break-in period. If there is a lot of black sludge on one or two of the rods, check the alignment of all three towers to make sure the printer is square.
The Delta can be a bit finicky to set up, but it is a fantastic printer once you get it dialed in.
The Doctor is right.
Another thing to consider.
Is the machine sitting on a solid surface.
Are the feet level so the printer can not move when the head is moving around?
The buildtak wasn’t cut to size, I did that but unfortunatly this doesn’s solve the issues.
I tightened the couples and lubricated them. I am using WD40, should that be sufficient?
I lowered the sensors and wow, the machine actually prints the demo print!! It works fine now.
The printer is indeed leveled.
So now my only issue that stands:
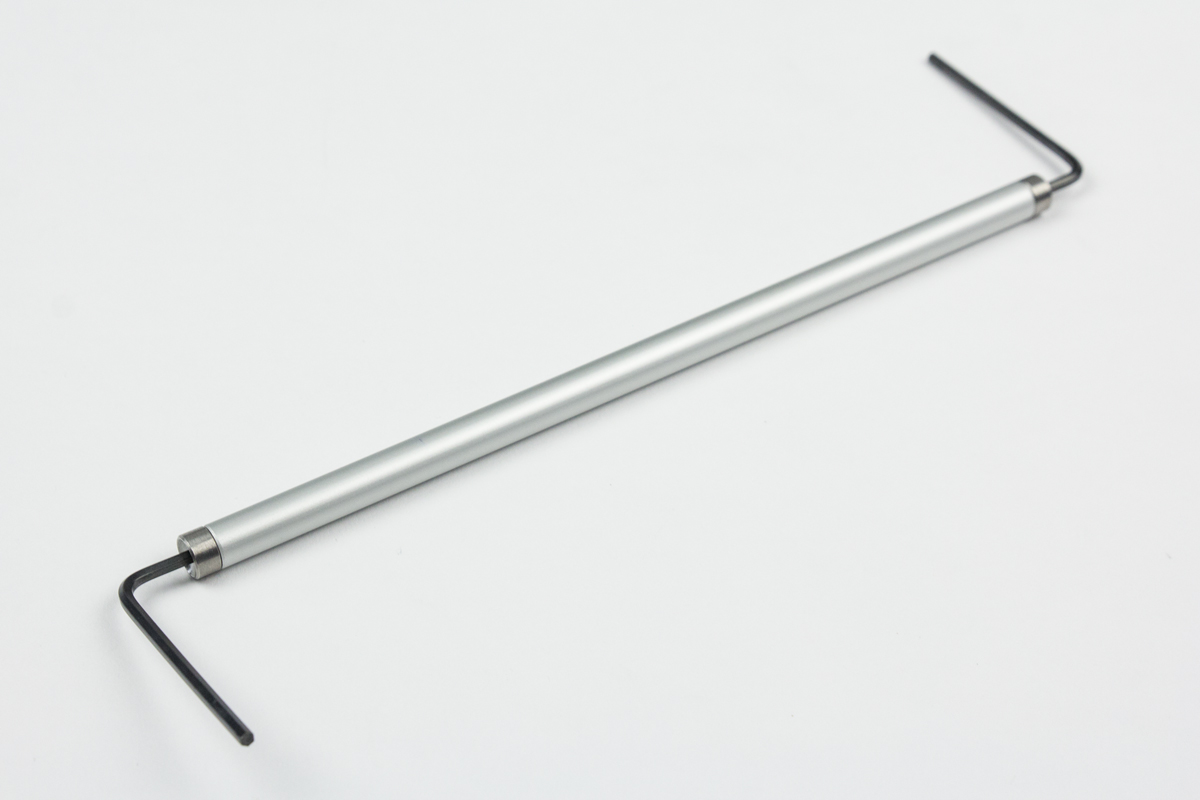
When I give the order to print, the rod with the magnetic ball comes out of its socket when the printhead is placed to the side of the machine. This way the machine can’t function so I manually put it back before the printing begins.
At least I can now print, but I would really like some suggestions on how to get rid of the problem with the disconnecting rod.
I don’t think WD40 is the best thing to use as a lubricant. For the rods, I use a light “3-in-1” oil, also known as “light machine oil” or sometimes “sewing machine oil.”
For the balls, I use the recommended teflon lubricant (DuPont Multi-Use Lubricant with Teflon), but I would even use 3-in-1 oil instead of WD40 if you can’t find teflon.
Make sure the balls are kept clean, and wipe away any excess lubricant. I usually lube the magnetic balls by placing them in a plastic bag and spraying the lube in.
I find it helps seat the rods if I spin them between my fingers before starting a print job.
Is it always the same rod that disconnects? Does the problem move/follow this rod if you swap it with a different one?
It is always thesame rod as in the clip in my first post. I swapped all rods and tried different ones on this magnetic ball. Always same problem.
I did screw the rods like your picture.
Thank you for your tip regarding oil. I will go to the hardwarestore monday to buy some.
Printing seems fine now, I already printed my company logo and all is very easy. Result is great!
As long as I put back the rod when I start printing i’m fine.
Unfortunatly, the printing isn’t going as smooth as i had hoped.
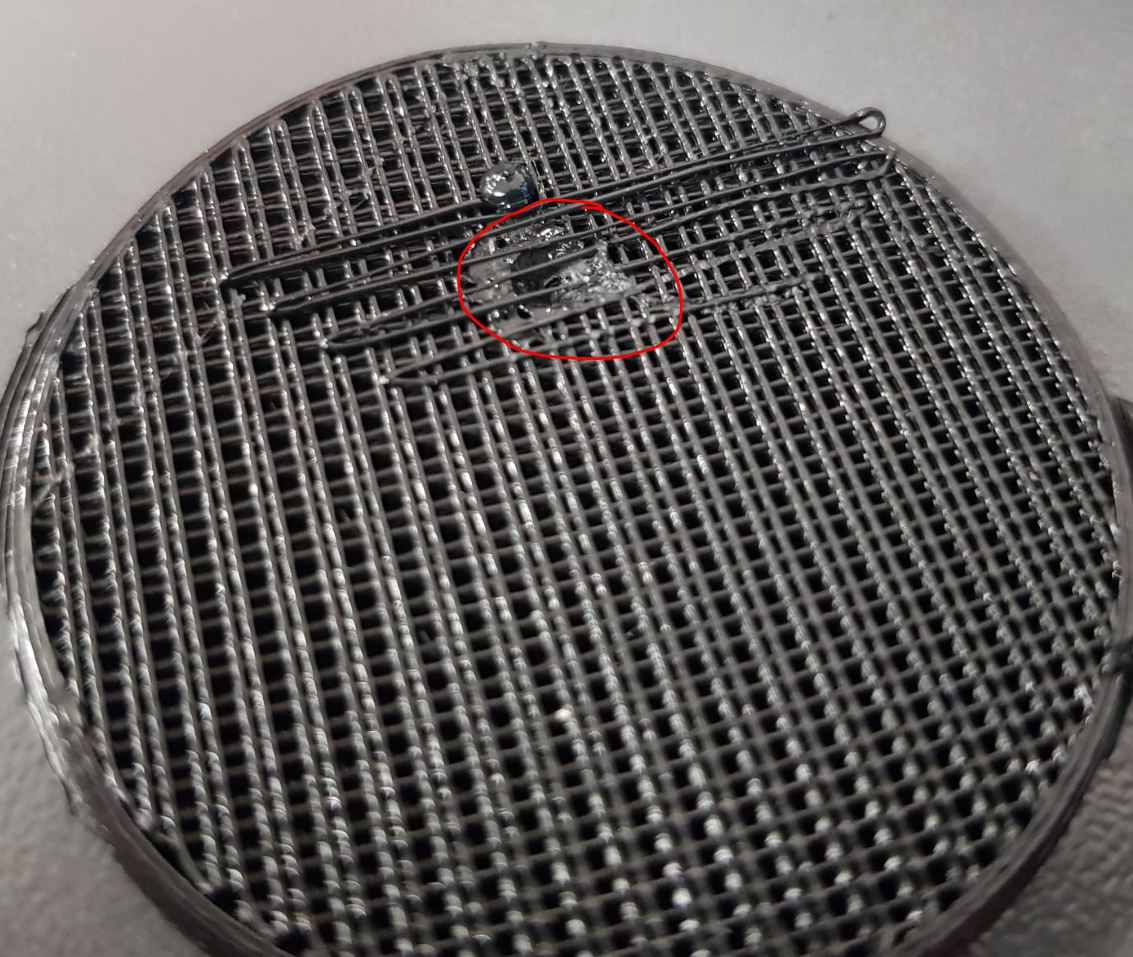
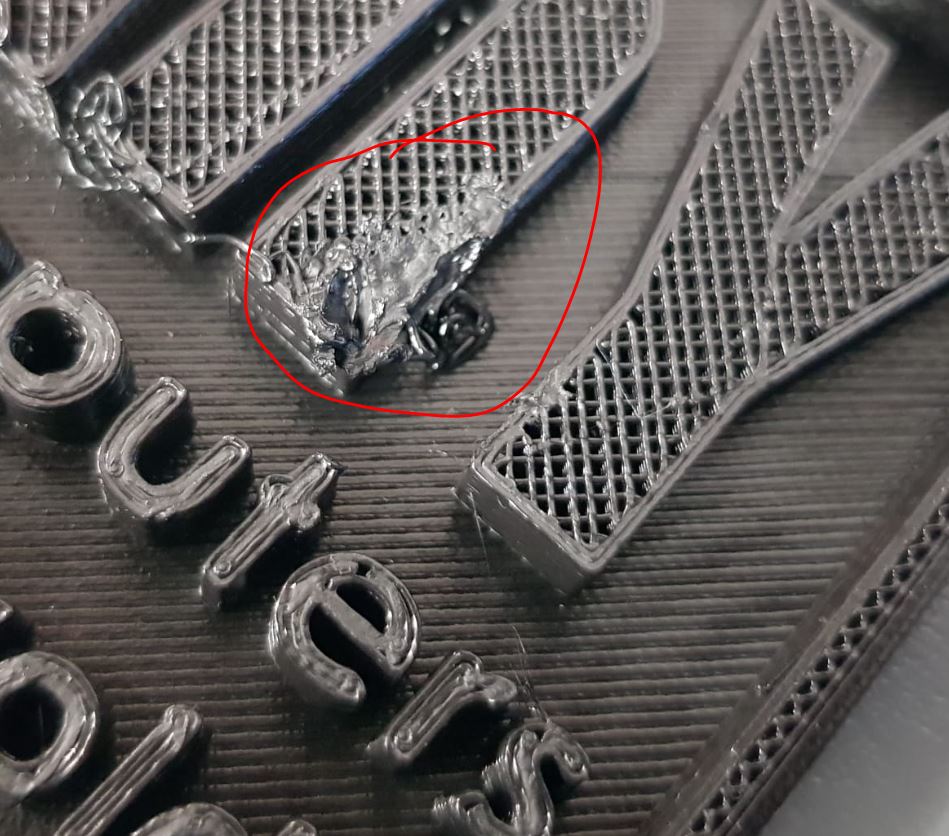
Below I attached 2 photo’s of projects where the rods on the left side snap off while printing.
Then, the printhead plows into the project leaving a melted piece of plastic in the middle. Reattaching while printing is no good because the calibration is all gone by then.
So I am still unable to print
Anybody have any clues how to avoid this problem?
It looks like the machine is now calibrated correctly, although it is a good idea to periodically run the auto-calibration procedure and save the fresh results.
The problem now may be due to break-in of the brass bushings. These bushings are metal-on-metal, and so are expected to wear in over the first several hours of printer operation.
You could start by printing a number of smaller objects and working your way up to larger/taller jobs.
Watch the vertical rods for sludgy buildup, and keep them clean and well lubricated. Listen for unusual noises coming from any part of the printer - a well calibrated, squared printer with proper belt tension will be relatively quiet, and any noise is a potential clue.
Thank you, I bought me some oil for sewing machines and now I’ve been able to print some fun objects.
However, i am still having 2 problems:
The printer still parks the printhead outside of the base therefor the rod still comes loose.
While printing, the printer will on occasion just stop and retracts the filament. I dont know why, but it’s quite a nag because the project of today (16hrs of printing) stopped around 12 times by now.
I think this second issue is caused by the printer ‘thinking’ it’s out of filament. Almost as if the printer isnt pulling hard enough to make the spool on top spin to get the filament off.
Let’s tackle one problem at a time.
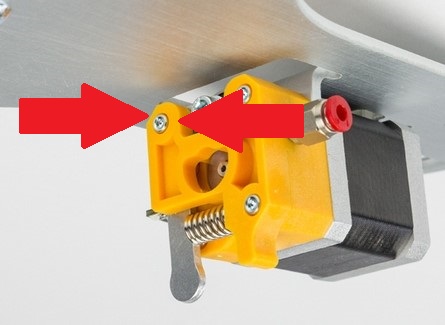
When you say the printer is out of filament is it unloading the filament?
Check this screw and make sure it is NOT tight.
Thank you for your response.
I will pull out the detector, but the filament is 1.75mm like stated so there must be a malfunction of some sort.
At least I can now resume my print without having to refill it every 3 minutes.
Thanx!