[quote=“Erik M”]You don’t need any additional components to run the hotbed on a higher voltage.
You do like this:
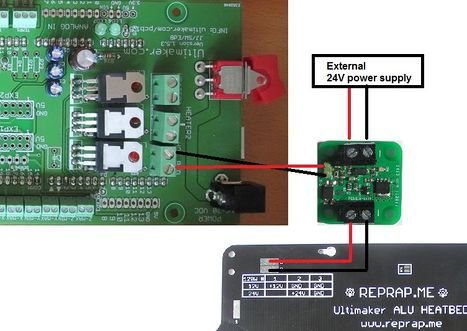
A - Connect minus of the second powersupply, PSU, to the minus of the board.
B - Connect one wire from the hotbed to plus on the 2nd PSU.
C - Find Heater2’s two +15V pins on the K8200 motherboard and clamp them out of the way.
D - Connect the other wire from the hotbed to Heater2’s two remaining [drain] pins.
E - [optional] Add a Heatsink to the Heater2 MOSFET.[/quote]
Thanks for the encouragement. Did a version of this today, using the onboard mosfet to switch the 24v to the heatbed. I did mine by using the PCB power barrel connector for the 15v supply, and the screw connector for the 24v supply. I cut a couple traces on the PCB to isolate the Heater 2 (heatbed) power input, to change it over to the 24v. I connected the barrel connector over to Heater 1 with a short piece of medium gauge wire. This way everything on the board is running on the 15v, except the heater 2 (+) connection is connected to the 24v supply. The 24v supply (-) is connected to ground, so when the mosfet turns on, the heatbed (-) is connected to ground, and the 24v runs through the heatbed, thru mosfet, to ground.
This way runs the LED for the heatbed off the 24v supply. I changed my LED resistor, R15, to 3K, but I’m not sure this is necessary, the original resistor is 1.8K, probably within safe limits for the LED current, as tiny as it is. I like the LED not being run off the 15v supply, because LED’s don’t like have voltage reverse biased, I’m not sure what the reverse breakdown voltage of our LED is. But, even if it died, there is the 1.8K resistor in series, so, even if it fails short, the +24v and +15v is only connected together with a 1.8k resistor, no safety issue for the rest of the electronics, just that LED.