I have the 2nd 3D printer of K8800, but I always got crash while printing and i think it is becuase the surface of each layer is not smooth and flat which caused the printing head stumbled or tripped !!!
I used 210C to print PLA fliament.
Thanks for your help and advise
Hi Orson,
Can you post a video of the occurrence? What kind of object are you printing?
If the head trips over de already printed surface this can indicate it is not moving in a flat XY plane. This can be due to loose belts or belt clamps, please check this?
Sincerely
I had checked the belts they are fine and tight , also the clamps are fine, the 3 sleds and move easy manually.
Hi Support team ,
FYI , I used Velleman PLA filament , Is it becasue the temp. 210C too high or the printing head has little blocking ?
thanks
Orson
hi Support team,
Have you seen my posted picture of the printed sample ? can you help , thanks
Orson
Hi Orson, I cannot see the picture? Have you embedded it in your post?
Normally the temperature will not affect this behaviour. Can you also check if the magnet cups on the diagonal rods are all fastened correctly?
Sincerely
Orson
A few things to check
Are the end stops in the correct position?
Did you calibrate it?
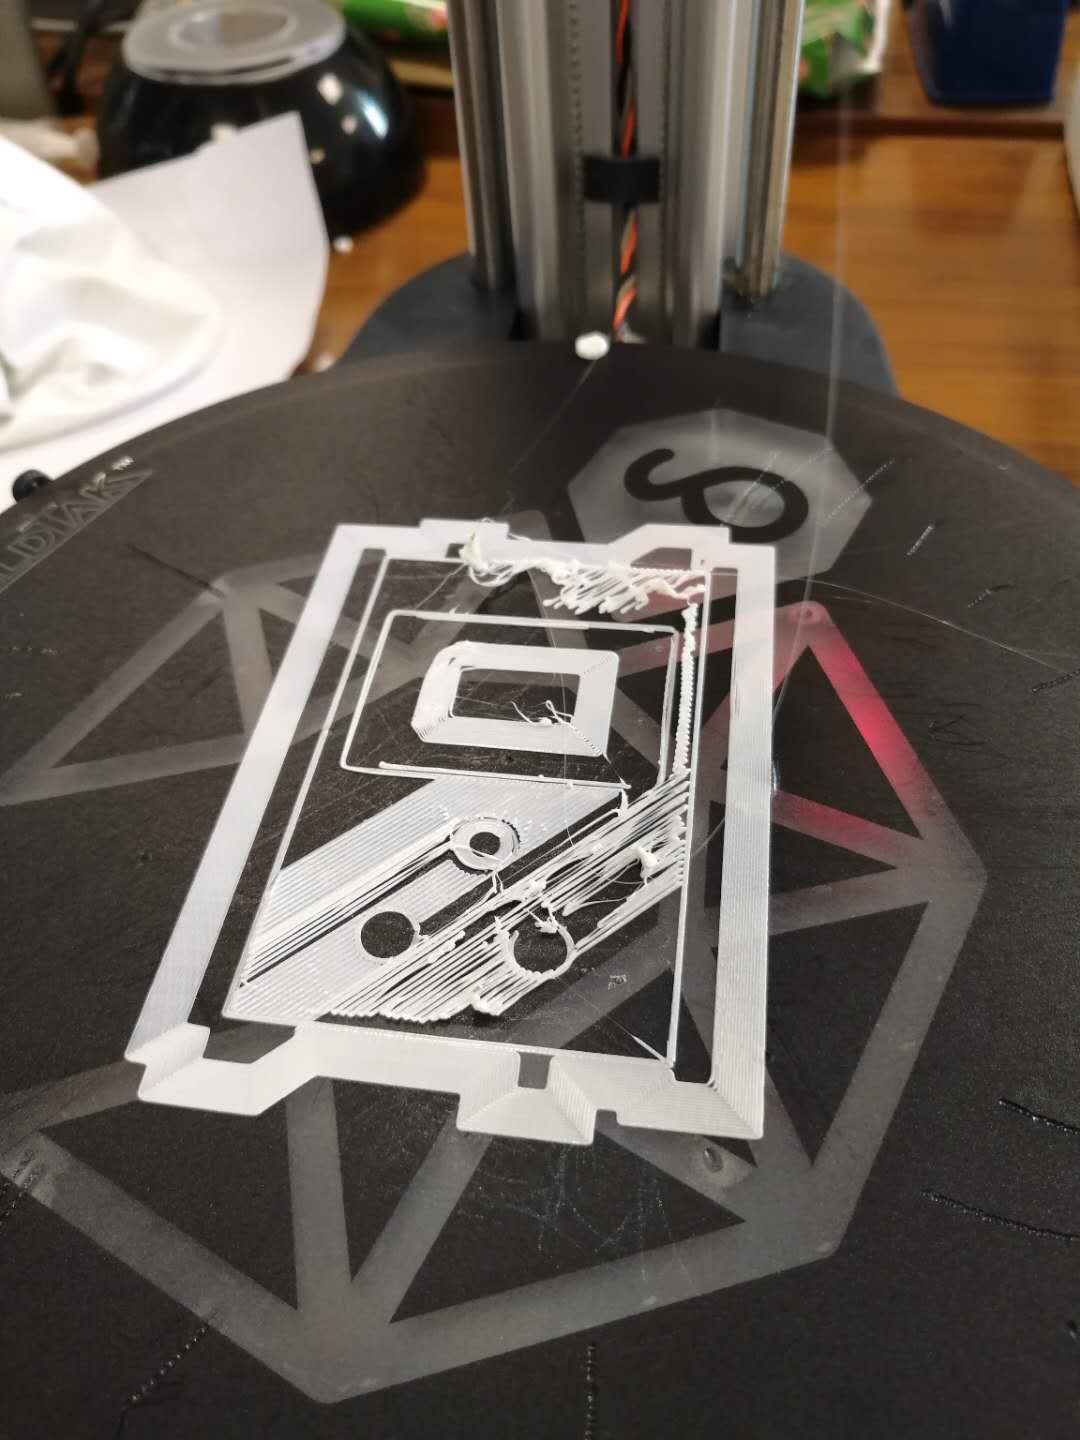
please check when I saw the printing surface is not smooth and flat I stopped it otherwise it will trip the printing head soon.
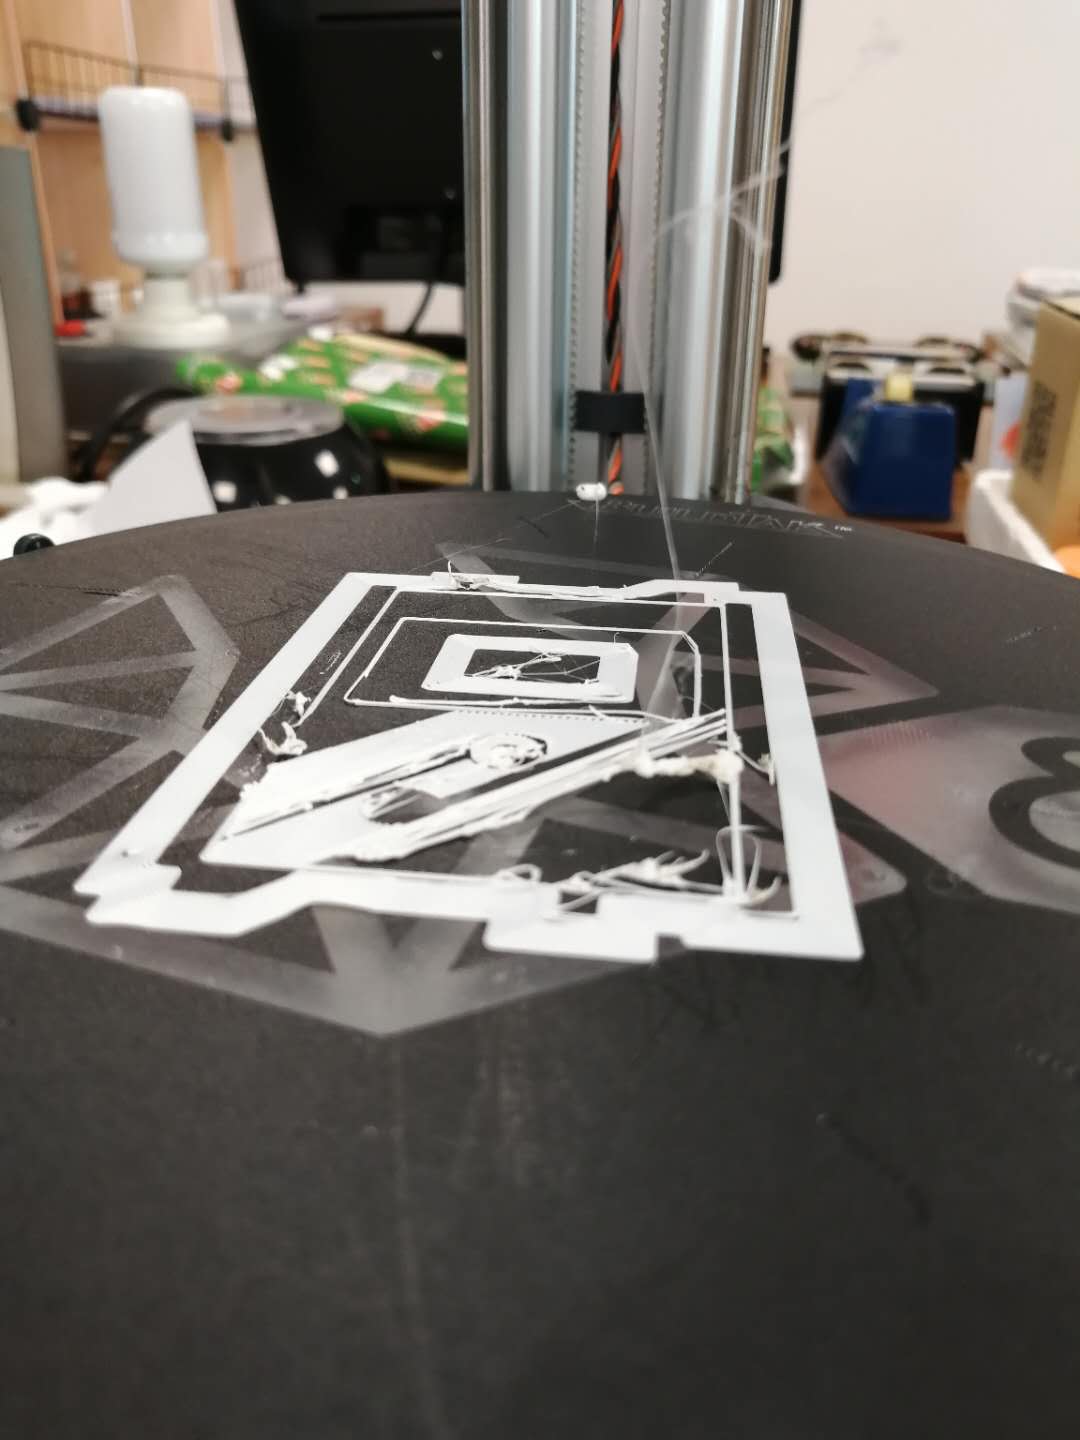
I just got a Delta this week and am having similar problems at times. This looks like a bed calibration problem. There should be more “squash” to the first layer extrusion - it is no good if you can see the individual strings.
On my cartesian K8200 machine, I don’t bother to get a perfect Z calibration - instead I make sure the bed is level and then rotate the Z axis during the brim/skirt to achieve a good first layer height. On a delta machine, this is not possible, and I am wondering if it would be a good option to add to the firmware (if it doesn’t exist) to allow manual adjustment of a Z height offset from the control panel?
I had a print doing this yesterday. I paused the print temporarily to clear the blobs. The print almost succeeded after that, but it curled and lifted later on.
Anyway, here are some things to try:
- Make sure the printer is level and on a solid surface before you calibrate.
- Make sure you perform a full “Automatic Calibration” followed by “Store Settings.”
- Make sure the nozzle is clean before you calibrate! If there is anything on the print head, it could affect the “tap” calibration procedure.
- Is there any grease or other buildup on your print bed? Isopropyl (rubbing) alcohol is your friend.
- Check the sensitivity of the piezos. If the first layer is too high, maybe you need to lower the sensitivity slightly?
- If you have trouble getting the BuildTak to take a print, try using the underside of the build plate instead. I cleaned the glass, then coated it with a glue stick and got a pretty good result.
Keep at it. When it works, it is a thing of beauty!
thank you Dr_Vegetable,
I tried again but still not workable,
awaiting Velleman service team more advises.
A few more things you could check:
- What kind of lubrication are you using on the slide bushings?
- Are you seeing any residue building up on the rods, and are you able to completely remove it before each print?
- If you move the carriages up and down, do you feel any “sticky” sections where the carriage doesn’t move as freely?
- If you gently twist the carriages, do they resist rotating? Are all of the tie-wraps tight?
- What kind of lubrication are you using on the magnets?
- Did you try printing on the glass side of the plate? What was the result?
- Have you experimented with different settings for the piezo sensitivity?
There can be many possible causes for poor bed adhesion on this printer. Everything has to be working just right or you won’t get very far.
The more information you provide about your situation, the more likely someone can help you.
Dr_Vegetable,
thanks for your advise again,
- for the slide bushings, I used machine oil that my car engine used.
- I always clean the residue on the 6pcs rods,
- i can move the carriages up and down manually freely and no sticky section.
- when twist the carriages,it has no rotating, and tie-wraps are tight.
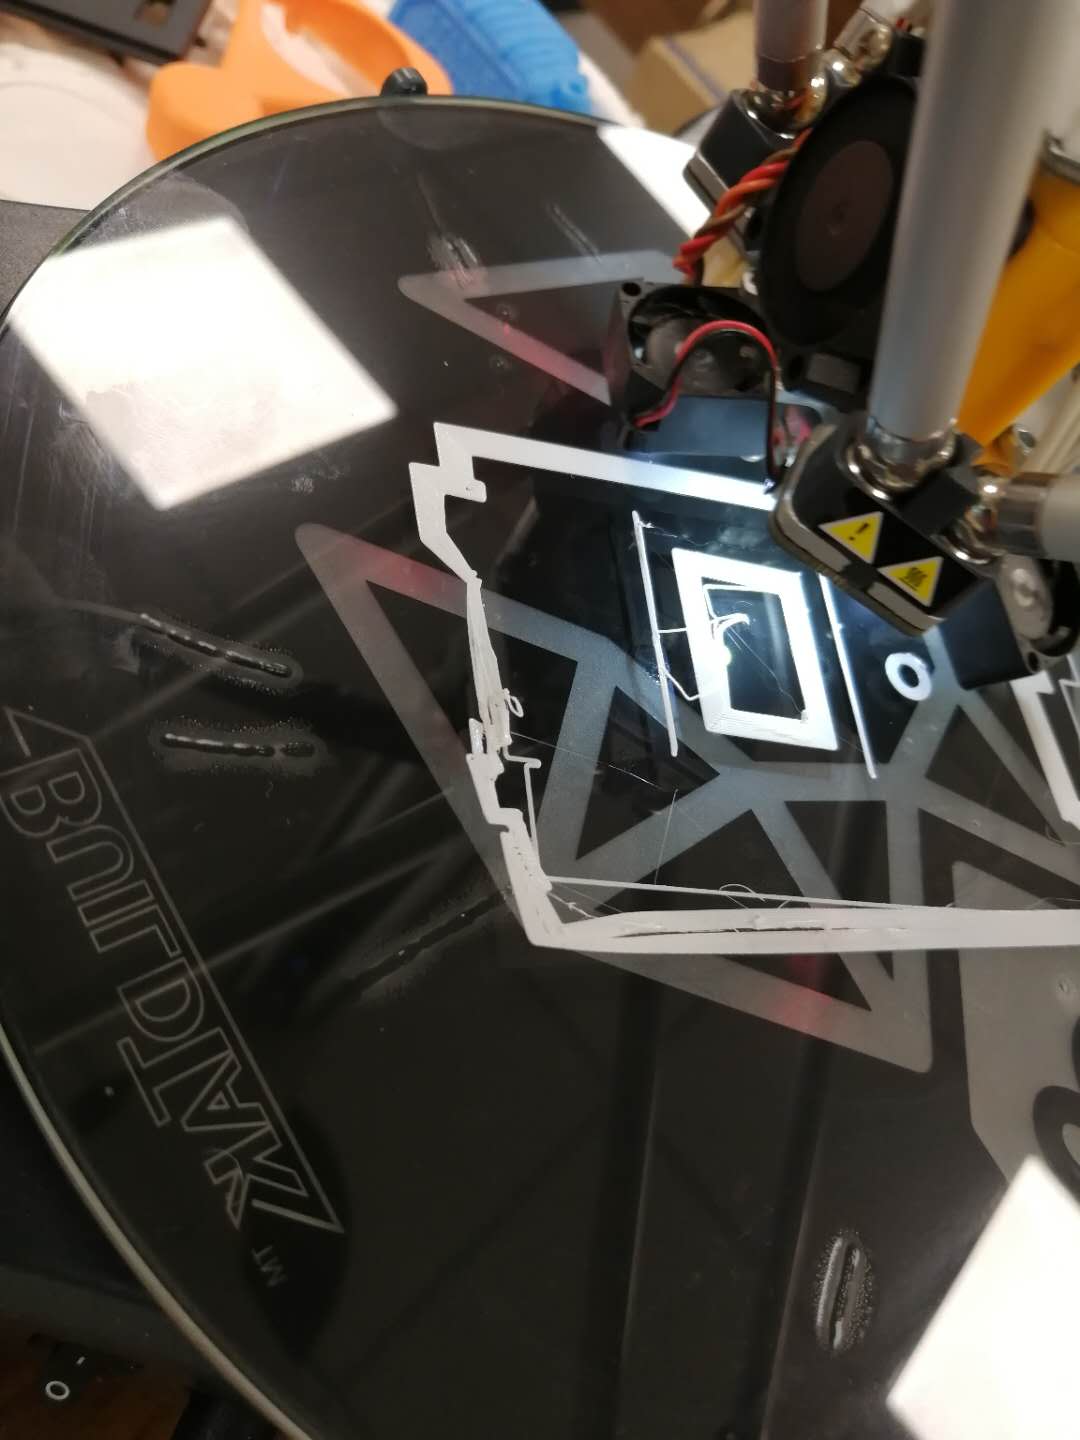
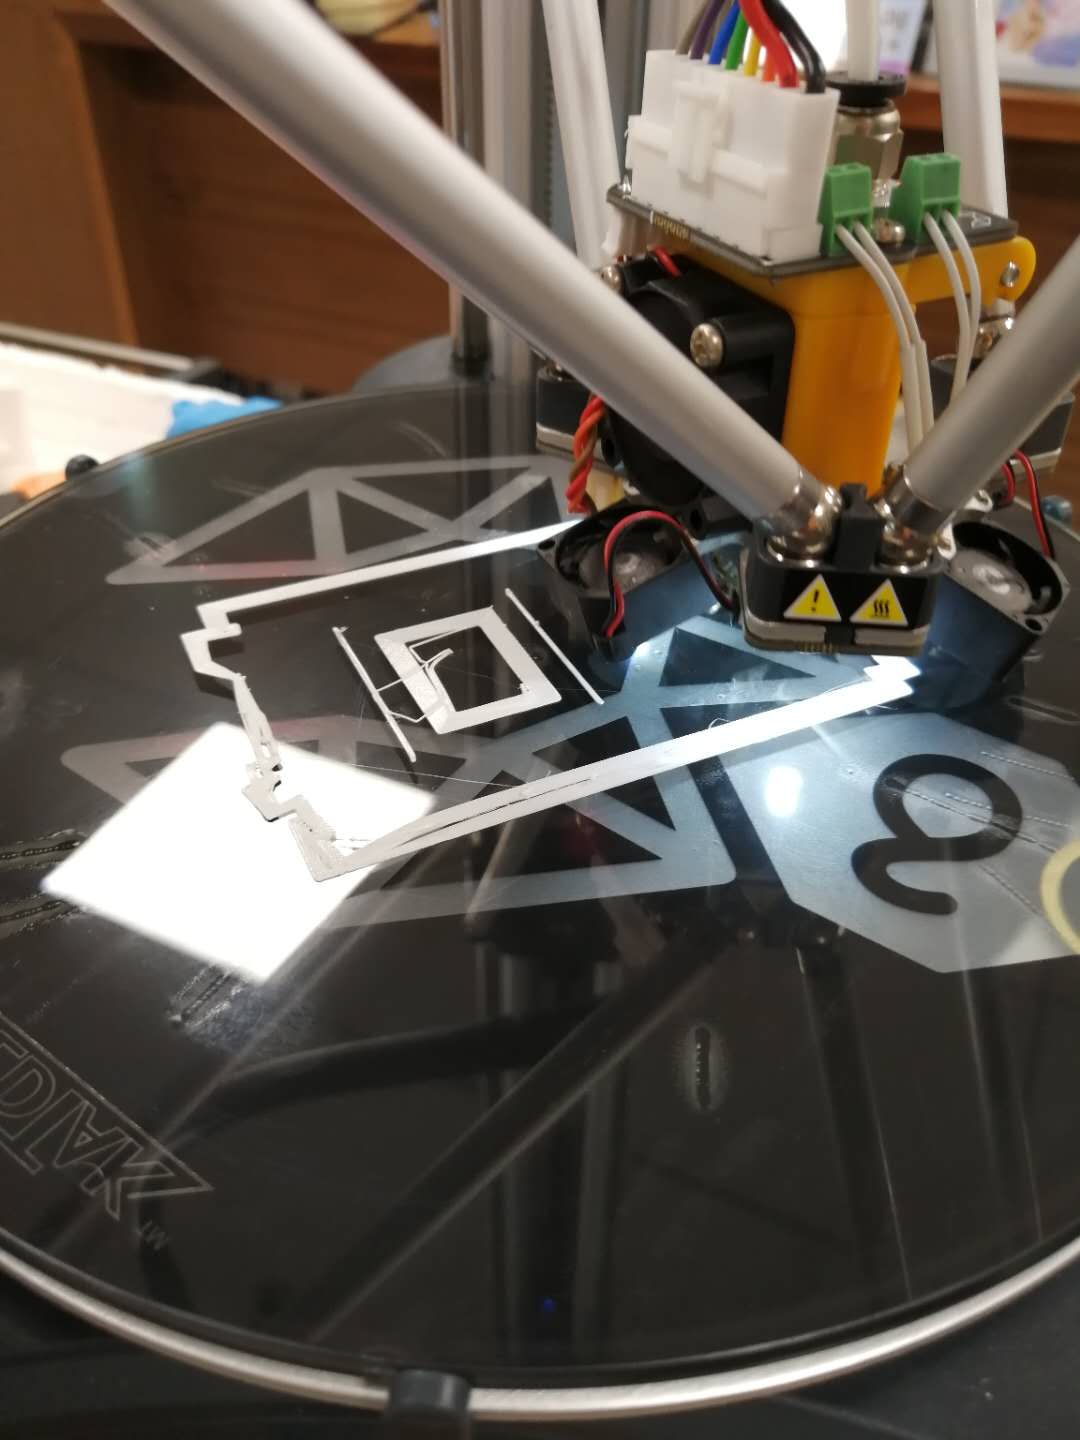
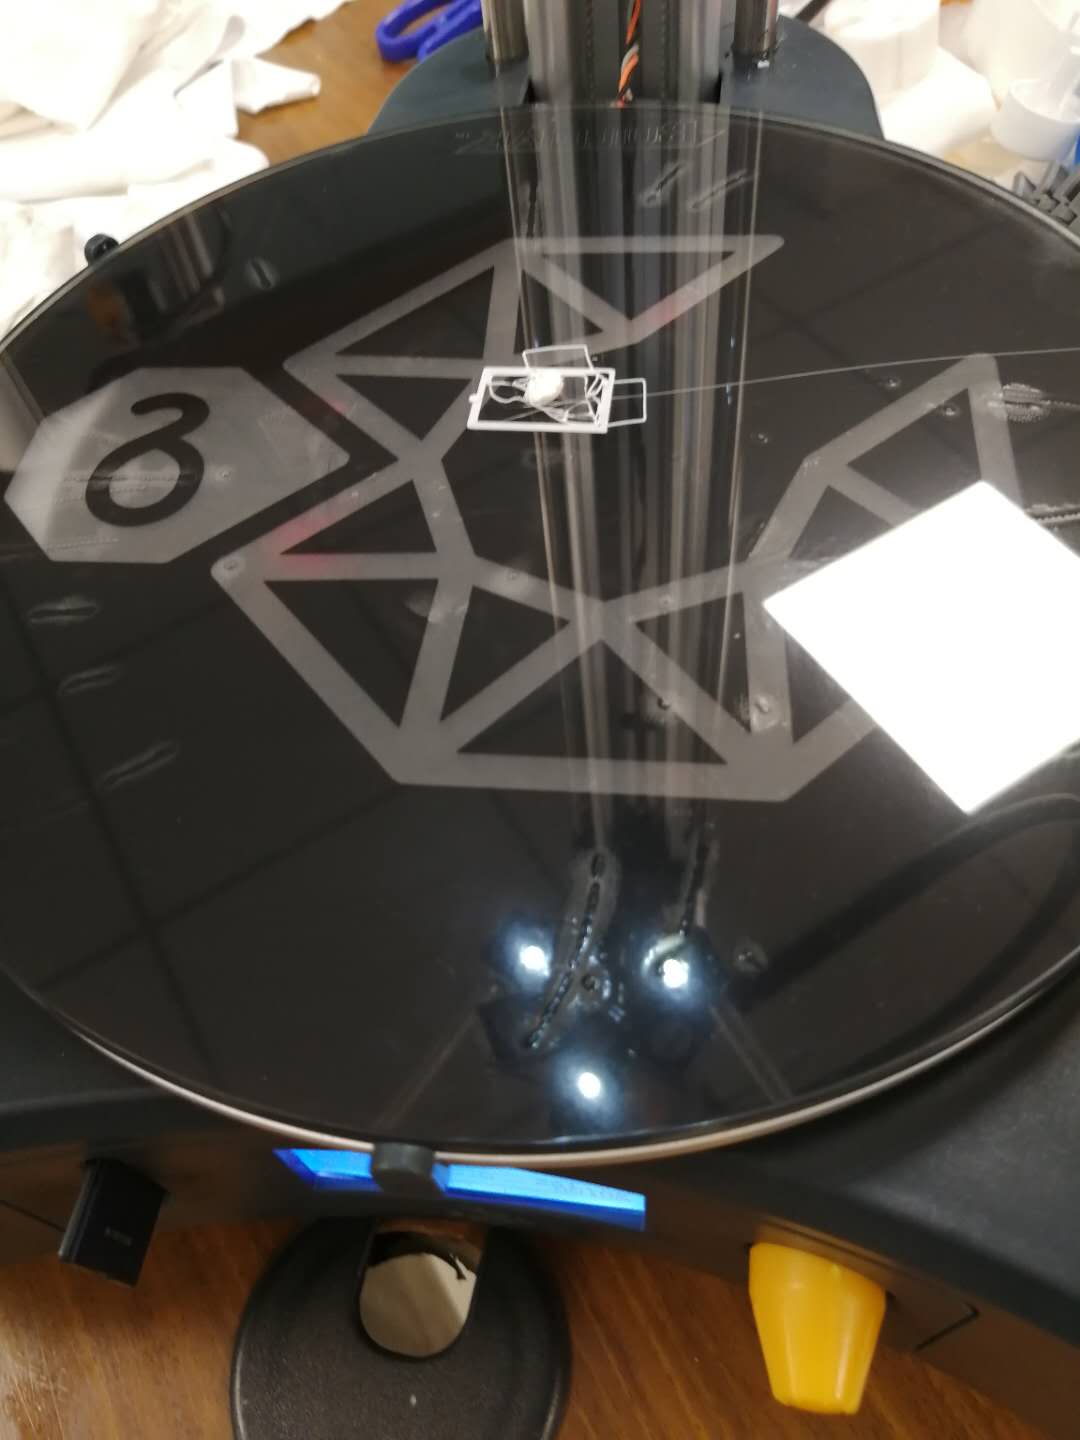
*on magnets I use the dry lubricant from Kontaflon 85 - I tried 3 times on the glass side of the plate, the frist squash does not stick on plate and other layers neither results moving printing (refer pictures)
- I tried turn the trimmer to max. sensitivity and min. sensitivity either has same results of printing
On the magnet cups on the ends of the rods I put Teflon tape (plumbers tape) to get them to stay.
Orson,
I am thinking that the motor oil may be part of your problem. Engine oil is intended to run at a much higher temperature than machine oil, and will likely be too thick at room temperature.
Try getting a light machine oil such as 3-in-1 oil or similar. Apply frequently, but wipe away the excess with a lint-free rag. You don’t want the bushings to be pushing (or pulling!) through a thick layer of heavy oil. On my machine, the “sticky” feel of the carriages was very subtle, but it became obvious after I cured it.
I also discovered today that the machine will get confused if your endstops are mounted too high up the aluminum frame. If the distance to the build plate is further than the firmware thinks is possible, it will seem to calibrate normally, but then the print head will home to a point some small distance above the plate. (I think this is what is happening.) So you could try moving your endstops down a few millimeters and recalibrate the machine.
Out of curiosity, how many iterations does it go when you calibrate?
Dr_Vegetable,
thanks for your comments,
Have changed to machine oil,
for endstops ? do you mean the endstop PCB, OK will try
for auto calibration, I usually need 4 iterations to be ok.
Hi Orson,
Sorry for the late reply. Is it possible to send us a video when the problem is happening. So a shot where we see the printer printing normally and when the problem starts to occur?
To lubricate the machine fine machine oil like sewing oil is needed.
You can check if you endstops are at a correct height by first calibrating and then checking the calibration with the “check X Y Z CENTER” options in the menu. If the printhead is not reaching the print surface at 0 then either the calibration was incorrect (unlikely) or the endstops are indeed at an incorrect height. Mostly they just need a little tweak. They should sit between 8mm and 5mm from the idler pully.
Sincerely