To make it adhere, cover your glass plate with kapton tape, then coat the kapton with acetone in which you dissolved some ABS for a few hours: instructables.com/id/100-War … -in-a-Jar/
The acetone will evaporate and leave a very thin layer of ABS on which your print will adhere very well (potentially too well, use only a thin spread! or you will be replacing your kapton on every print).
But Im afraid that may only be the start of your problems,… warping, delamination,… I hope you have more luck than I did.
Most people here - please correct me if I’m wrong - have printed ABS with upgraded heating capability, in order to reach higher temperatures on the heatbed and improve ABS ‘stickability’. Kapton tape or ABS slurry on glass, as P4man already wrote, are commonly used to further promote adhesion, but sufficiently high temperature is so far the key point for reliable ABS printing. On the other hand, there have been no reports of ABS working well on clean glass, so this seems to be a bad choice (in contrast to PLA, which works quite well on glass).
The main problem with ABS is that it shrinks when it cools down. At a certain critical height (1 mm for some objects, 5 mm or more for others), the tensile force that the new layers put on the print when cooling down becomes greater than the adhesion to the heatbed. Mostly this happens at corners and at the (free) end of long, narrow sections, since there the adhesion (which depends on the area) is small. The brim-setting will affect exactly that point: enlarge the area around all the edges to increase adhesion. For some objects, adding a larger brim will help, while others will detach no matter what. By the way, the ABS slurry also works as a kind of brim, providing a very large bottom surface for the print. Additionally, keep the fan at a very low setting or even off when printing ABS. Apart from better layer adhesion, the heatbed will keep a higher temperature without the fan. Also don’t put the printer next to a window or any other source of (cold) airflow or into a cold room for this. Note that the living room may also be a bad choice: hot ABS has a distincive “burnt plastic” smell, much more than PLA.
I am printing right now on a glassplate coated with a UHU glue stick. First layer is sticking perfectly
The printing is still ongoing but it looks good.
Here are my settings/instructions:
Grease the place where your model will be printed on the glassplate generously with a UHU glue stick.
I set the extruder heat for the first layer to 220C° and all the other layers with 215C°
The heatbed is heated to 65C° for the first layer and 60C° for the rest.
I’d recommend increasing the temperature, to 230 °C, 240 °C, or even 245 °C. At 215 °C most ABS is already quite viscous, so the extruder will have a hard time pushing enough filament through the hotend.
If you want to test the method a bit more extensive, design some part in the shape of the letter ‘T’, ‘C’, or similar, so that the shape is less compact. If the ends of the narrow regions still stick at, say, 10 mm print height, it should be stable also for larger heights.
Opti2000,
Is the print with ABS now ok with de UHU glue?
I have the same probleme, after the third layer the corners coming loose.
I tryed the abs disolved in aceton on the glass plate but no succes, it won’t stick on the glass plate.
Yes it is working great with UHU glue. I am using this one:
Just grease the area on your glassplate with the UHU glue and print. It will stick really nice on the
glassplate. Sometimes it is hard to remove the printed object afterwards but you can simply use some
flat tool to scrape it off carefully.
My settings with ABS.
First layer: 0.30mm
next layers: depends on the object. (i am using 0.15mm or 0.10mm if i want it detailled)
For a print without corners of your abs model curling up:
Print bed heat to 90°C.
Extruder on 230°C (hotter gives air bubbles in the material/ABS).
Before heating the bed : glue some thin cotton with UHU liquid transparent glue.
Make sure, the corners and rims of the cotton is nice fixed and does not curl up.
Adjust the nozzle head exactly, so that it levels the upperlevel of the cotton.
If the cotton is stuck well to the flat GLASS bed, then the nozzle will leave it on the bed.
Your footprint will be in the cotton en even the corners won’t curl up.
After printing the model and glue will come off in warm water.
The cotton is even reusable.
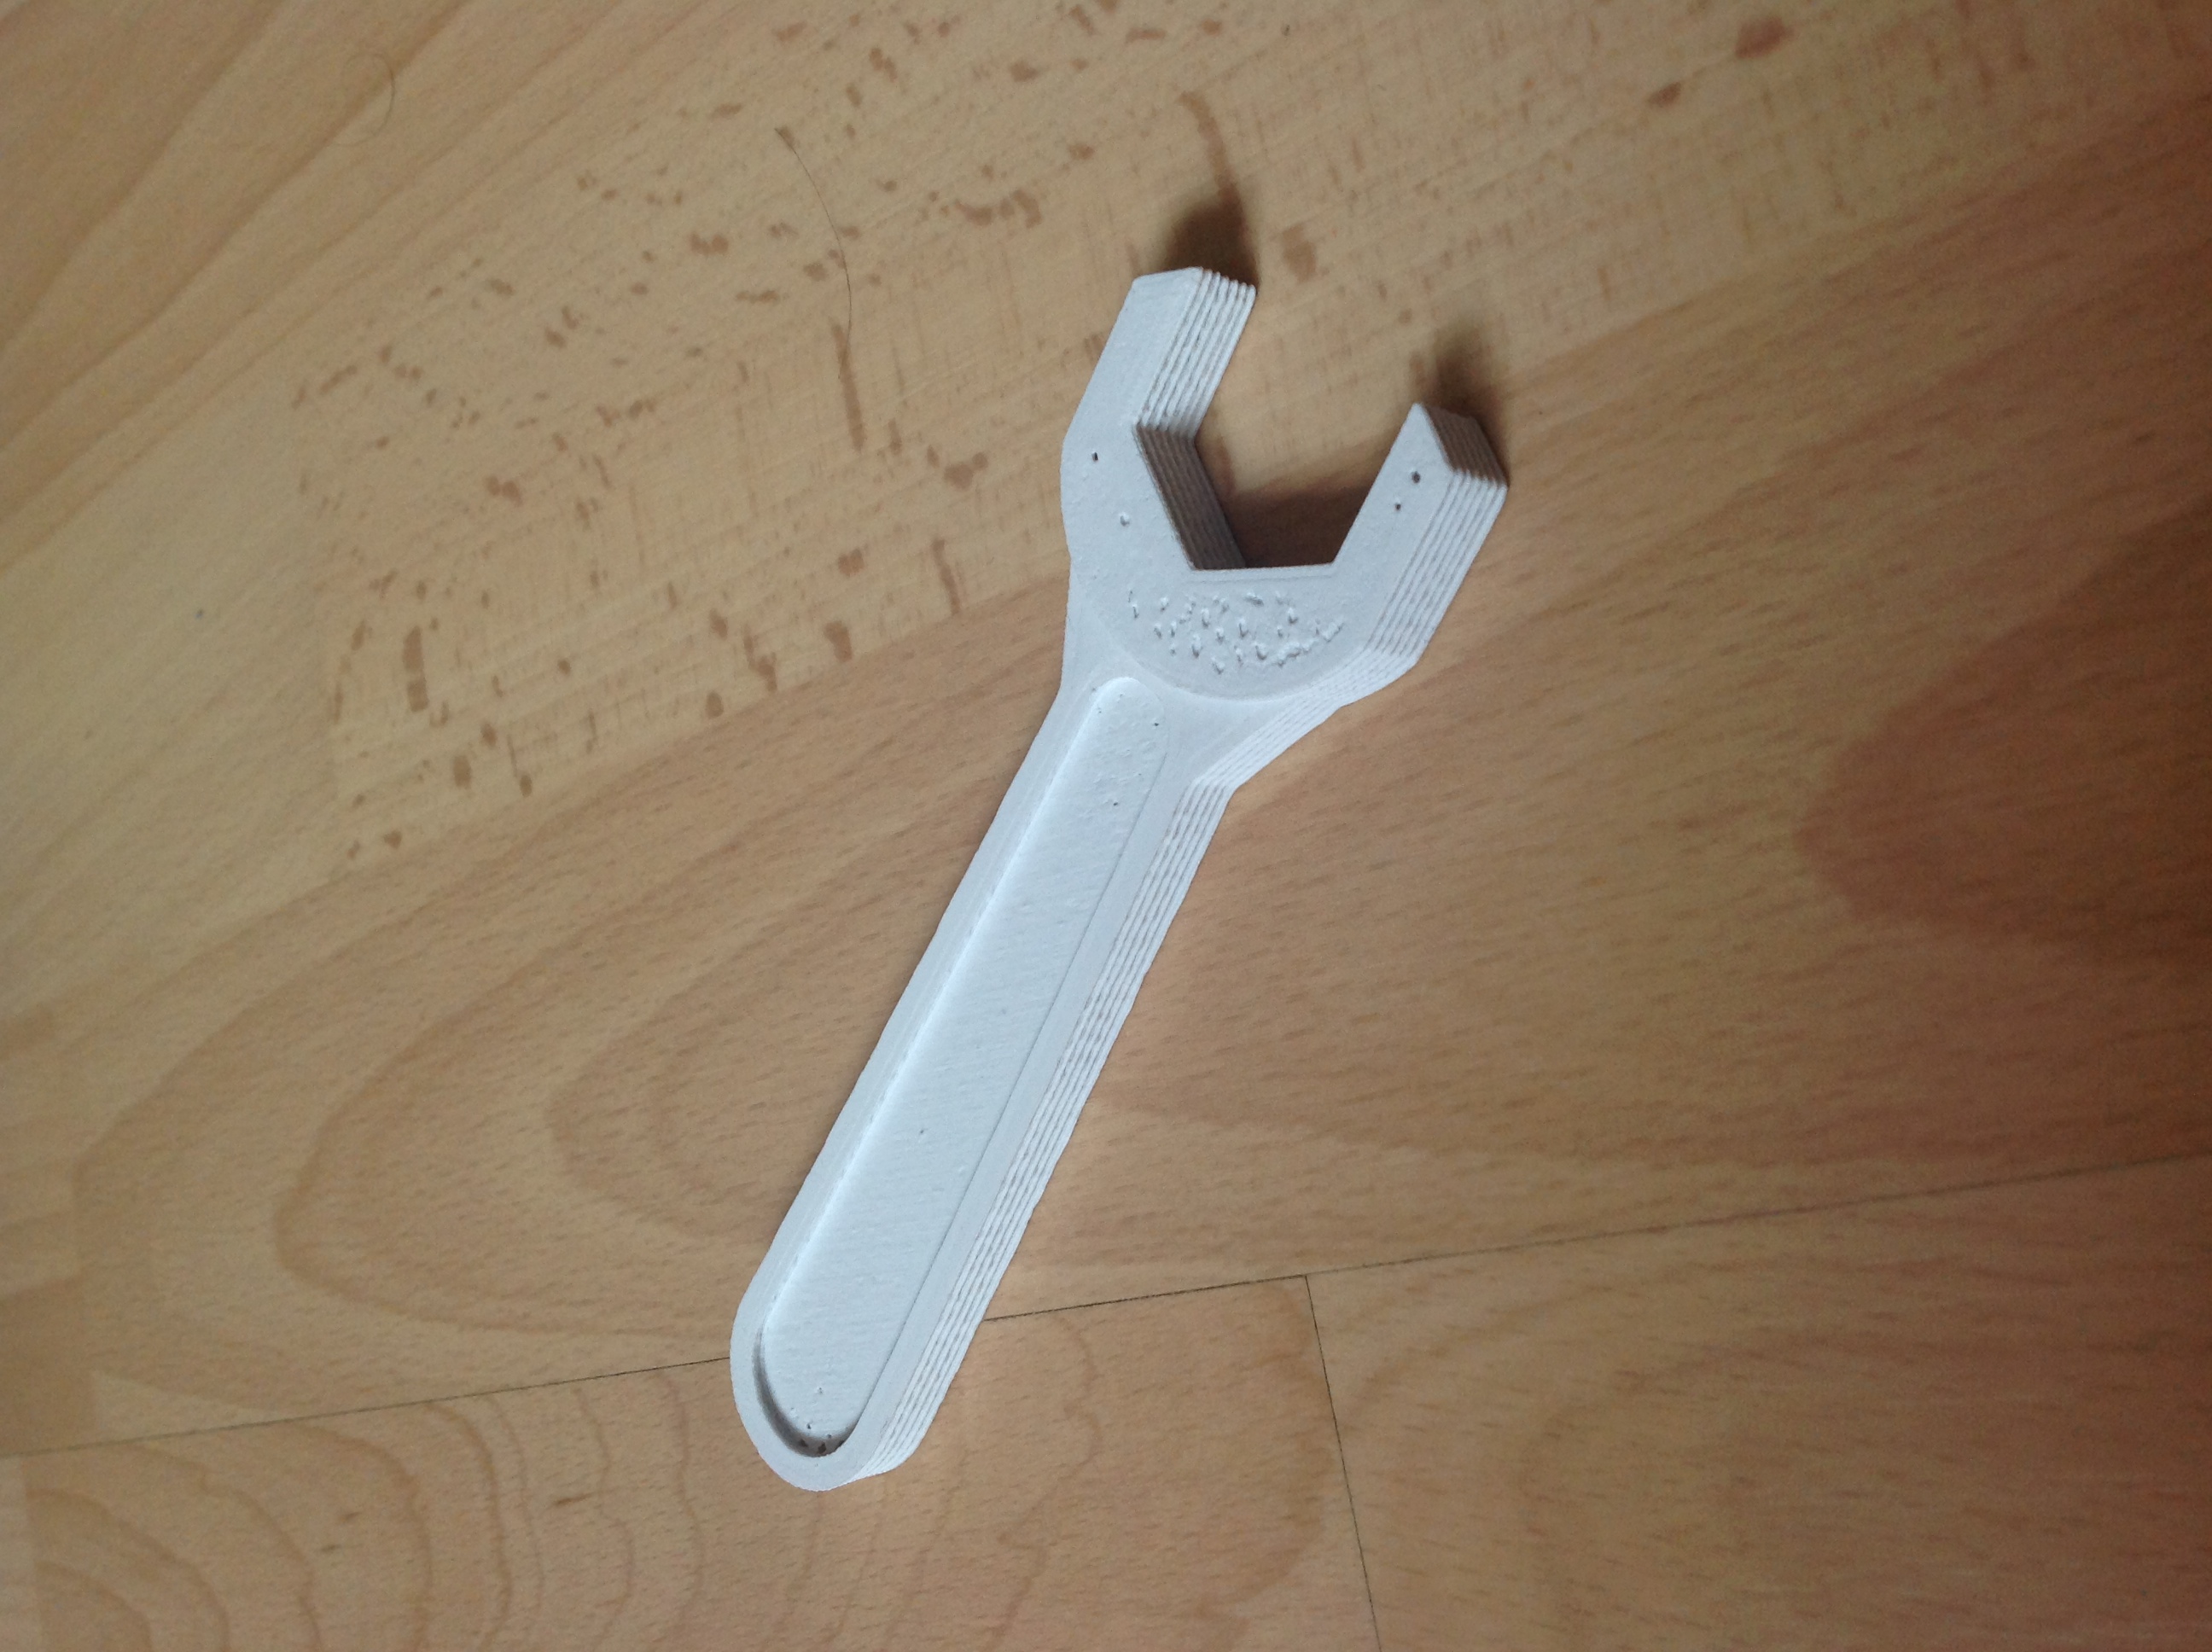
I have printed now some few objects with ABS and it works like a charm. But i got still some problems with the print quality.
Take a look at these pictures:
I printed a wrench and at first it looks allright but if you look closer there are some little holes
on the upper part and the sides also look spaced. (even though i printed with 0,10mm height)
Especially this spacing of the layers is really annoying. How can i prevent this? Is it possible to
print flat sides without the grooves you see in this picture?
To avoid the holes you’ll have to play with the amount of extruded material.
ABS is quite tricky when it comes to find the right adjustment. A lot more than PLA actually.
Too much and you’ll have blobs scraped by the nozzle and bulging corners. Not enough and you’ll get holes and slits between layers.
Problem is that ABS doesn’t spread easily like PLA. For the same reason you also must have a perfectly flat and horizontal heatbed and the height between bed and nozzle must be set equal everywhere as well.
And no cooling of course.
[quote=“opti2000”]Yes i allready noticed that my Z-axis is really hard wobbling. The motor down the Z-axis is noticeably going back and forward.
How can i fix this? I mean the Z-rod itself is crooked.
The question is:
Why do i even get a crooked Z-rod anyway out of the box?[/quote]
Give it a quick try with a removed top nut, just leave it swinging around for a test, that is how I do it but it is hardly bent. The Z-rod will stand on the motor and that is no problem. Big chance that it will improve a lot.
You can try to straighten up your rod (by hand putting it on a flat surface). You can also remove the lower nut from the ball bearing holder and tighten lightly the upper one (just to hold the ball bearing in place).
A flex coupler between the motor shaft and the rod helps a lot too.
Replace the Z-axis screw and the nut. It’s easy and cheap solution and it fixes the problem.
No firmware update needed because the same size and pitch screw rod made of RST is VERY GOOD quality comparing the original one.
If the step motor is not in line with the screw and the motor is fitted only on printer frame side by two screws it is the reason for huge Z wobble