Hello there!
After a few weeks of experimenting with the K8400 and the TMC2130, which can work without the SPI functionality on the original FW with a small modification.
But then you basically get a TMC2100 which I don’t really want (and I guess you too, since you’re reading thins)
Before we start want you to know that you’re doing this on your own risk and if you bork your printer it’s not my fault.
So lets get going.
What you need:
Watterott TMC2130 with heatsinks (watterott drivers are recommended, the ebay ones from china gave me a lot of trouble)
A bunch of jumper cables
Header pins and connectors
I’d recommend you to first watch Tom Sanladerers video on the drivers, he’ll give you the information you need on how to solder pins etc.
https://www.youtube.com/watch?v=sPvTB3irCxQ
Okay first you need to take out the main board from your printer since you need to do some soldering.
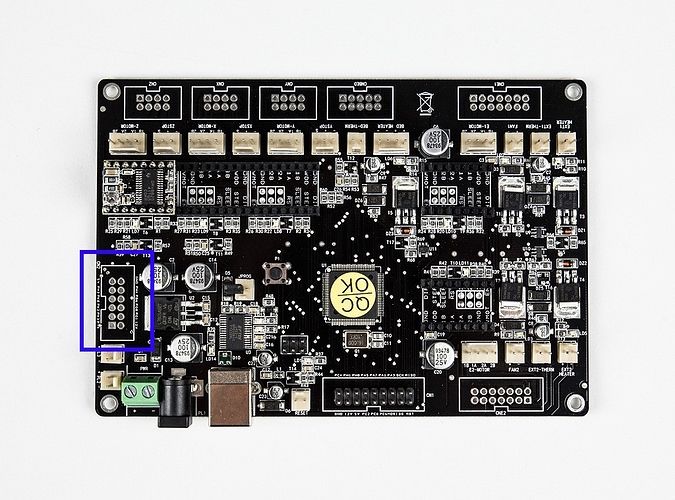
We will be using the pins located here:
So if you have the RGB leds installed I’m not 100% sure this will work since we need some pins from there for Chip Select.
But anyway, solder pins to the connectors make sure the pins point upwards, and then put the board back.
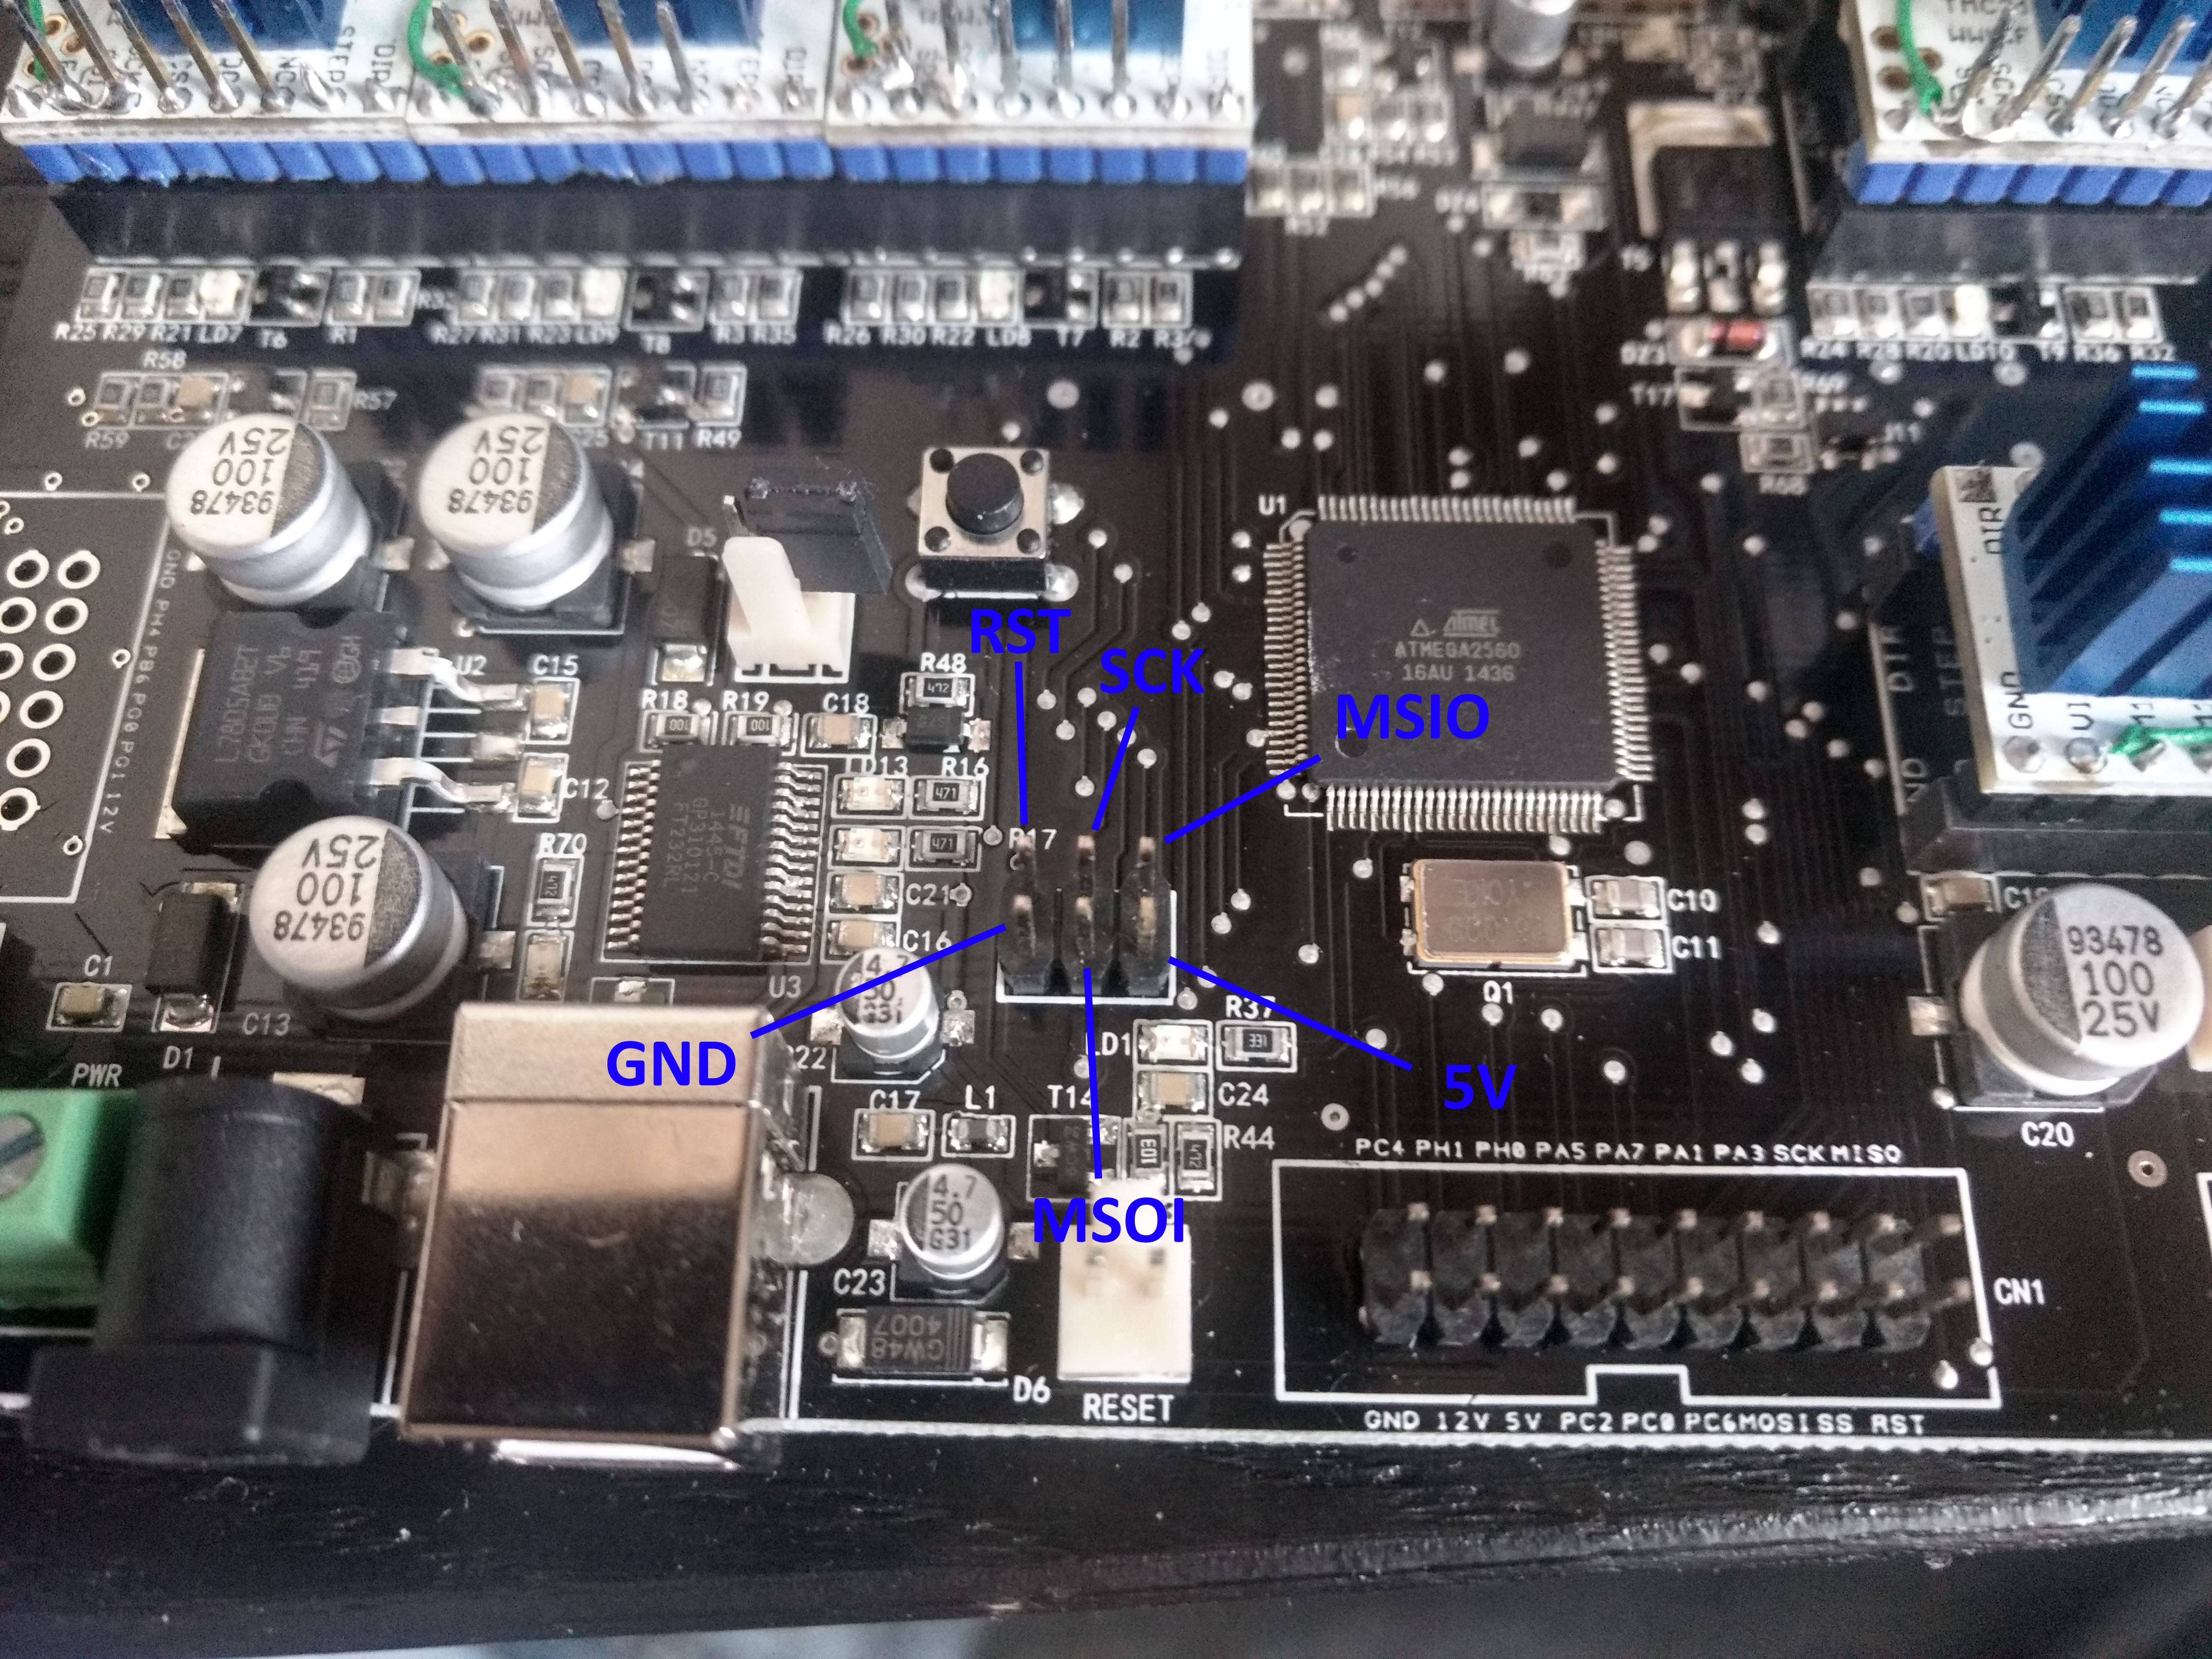
Now we need to find the SPI pins, and they are conveniently placed in the middle of the board.

Use some of the jumper pins and solder 5 (4 if you only have 1 extruder) cables to a header connector use some heat shrink tube if you want to make it tidy.
Do this so you have 5 cables from MOSI, MSIO and SCK.
Now you should connect everything like this.
To all drivers
MSOI to SDI
MSIO to SDO
SCK to SCK
And the CS pins
From board to driver
PIN PG1 to CS on Z axis
PIN PG0 to CS on Y axis
PIN PB6 to CS on X axis
PIN PH4 to CS on E0
PIN PH3 to CS on E1 (if you have dual extruder)
Now the hardware part is finished and now we need a modified FW to run it.
I used the latest version on Marlin which is, at the moment 1.1.8
Download if from marlins website and do the following modifications.
Unpack the file and copy Configuration.h and Configuration_adv.h from …\example_configurations\Velleman\K8400
Make sure you copy the right config file. and past it in the Marlin root folder and overwrite the original files (or make a backup of them if you want).
Use the latest version of arduino for this.
Now edit the following
In Configuration.h
Change
#define INVERT_X_DIR false
#define INVERT_Y_DIR true
#define INVERT_Z_DIR true
to
#define INVERT_X_DIR true
#define INVERT_Y_DIR false
#define INVERT_Z_DIR false
and
#define INVERT_E0_DIR false
#define INVERT_E1_DIR true
to
#define INVERT_E0_DIR true
#define INVERT_E1_DIR false
and edit
#define DEFAULT_AXIS_STEPS_PER_UNIT { 134.74, 134.74, 4166.66, 148.7}
to
#define DEFAULT_AXIS_STEPS_PER_UNIT { 67.37, 67.37, 2133.33, 74.35}
Since the old drivers had 32 steps/mm and these has default 16 steps/mm
Then in Configuration_avd.h
change:
//#define HAVE_TMC2130
to
#define HAVE_TMC2130
and
//#define X_IS_TMC2130
//#define X2_IS_TMC2130
//#define Y_IS_TMC2130
//#define Y2_IS_TMC2130
//#define Z_IS_TMC2130
//#define Z2_IS_TMC2130
//#define E0_IS_TMC2130
//#define E1_IS_TMC2130
//#define E2_IS_TMC2130
//#define E3_IS_TMC2130
//#define E4_IS_TMC2130
to
#define X_IS_TMC2130
//#define X2_IS_TMC2130
#define Y_IS_TMC2130
//#define Y2_IS_TMC2130
#define Z_IS_TMC2130
//#define Z2_IS_TMC2130
#define E0_IS_TMC2130
#define E1_IS_TMC2130
//#define E2_IS_TMC2130
//#define E3_IS_TMC2130
//#define E4_IS_TMC2130
In pins_RAMPS.h
Look for
#define X_CS_PIN
#define Y_CS_PIN
#define Z_CS_PIN
#define E0_CS_PIN
#define E1_CS_PIN
look change the pin number so they match the pins we soldered earlier.
So X pin should be 12
Y sould be 41
Z sould be 40
E0 sould be 7
And E1 sould be 6
This is the setting we needed to make basic TMC2130 SPI functions to work.
Tom has more tips and tricks on the different functions
Now we need to install a required library to make the FW be able to communicate with the drivers.
Open the Stetch menu > Include Library > Library manager
And just search for TMC2130 and install the library from teemuatlut
Now we’re ready for compilation.
If you have a heated bed or other mods, make sure you do the necessary changes in the FW before you upload.
Upload and test your setup
Congratulations you now have a smart K8400! ![]()


