Hello,
I finished building the printer yesterday - I’m new to the field - and the tap test, calibration etc run perfectly. The sleds run quietly, the fans whirr, and LEDs flash in an appropriate and gratifying way.
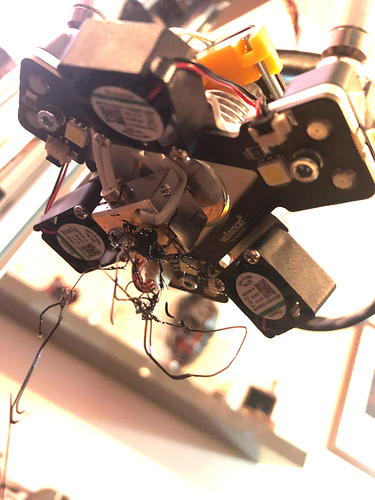
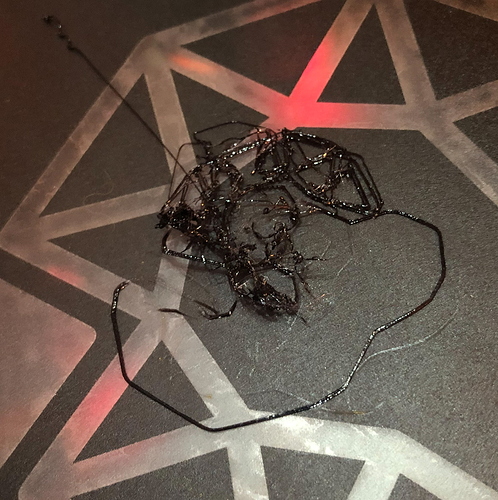
Unfortunately, the printing part of the printer results in disaster. Everything seems fine for the first layer or so and I can see the outline forming as expected. Then something goes wrong, as per the image.
This is broadly reproducible, in that the print will always go askew after the first couple of passes and start to peel up from the bed and stick to the print head. I’ve tried:
- Running calibration repeatedly and re-saving settings (is it just a two-tone melody that plays? Is there a sound for failing to save? I’ve noticed that if I adjust the contrast of the LED, power off, then power on, the contrast setting isn’t preserved).
- Moving the printer (and re-calibrating each time) to a couple of different surfaces and out of potential drafts
- Loosening the belts slightly (I don’t know what the ‘ideal’ tension is, however)
- Ensuring a light tap causes the trimmer LED to flash
- Lubricating the magnets and rods
- Adjusting the end stop height (distance from the nut on the end stop to the base is 58 cm approx)
- Cleaning the nozzle
- Ensuring the build tak is trimmed at the edges (the plate sits neatly on the clips and I see this shouldn’t be a tight grip - but again, I’m not sure how loose/tight this should be. It won’t turn if I try to spin it, for example, but I don’t have to expend effort in prising it loose.)
- Sacrificing imaginary goats to the outer darkness
I’m a little concerned that it’s ambient temperature being unsuitable for the printer but I can’t make the house any warmer. Is there anything anyone can suggest? Happy to take more pictures, etc as required - any thoughts are much appreciated.
PS Is there somewhere in the manual that explains all the functions in the menu? Can’t seem to see anything more detailed than the setup/calibrate/print site.

